How to Query Transparent Utah with R or Python

How do we query Big Query directly with a programming language?

Quick answer: You need to first authenticate via a programming language and then use that programming language's client libraries. We will first show you how to authenticate and then we will link example scripts using the client libraries within R and Python from our Github.

Authentication and Service Accounts

There are many different ways to authenticate with Google Cloud Platform. For example, in previous tutorials you have likely logged in via your email to the web console. This interface is helpful, but sometimes we wish to query the database within a programming language instead of having to use a web client and download csv/json results. Some client libraries like R's bigrquery and Google's python client library for Big Query both allow for email authentication. You can follow each package's documentation, but this usually involves invoking a function call which makes you sign into Google in an external browser. This can be cumbersome and also undesired since sometimes we want a script (like ETL or a dashboard) to execture independetly of the user logging in.

We recommend a different workflow using Service Accounts. Google Cloud Platform allows you to create file credentials that you can reference with programming languages (R, Python, Julia, etc) to query Google Big Query directly from a programming script or console. These credentials are called "Service Accounts" and can be stored in a safe place on your computer. Instead of logging in via an external browser request, you can reference the Service Account's file path to authenticate. The next section of this page details how to create a service account. Please follow the instructions and send the Transparent Utah team (alexnielson@utah.gov) your service account's email. We will whitelist it and it will then be ready to query the database.

After you have a whitelisted service account, then you can view the full examples on our Github:

How do I create a Service Account?

If you want to learn more about service accounts, please review GCP's documentation https://cloud.google.com/iam/docs/service-account-overview.

This tutorial will show how create a service account and grant it permissions to use Big Query in your project.

1. Visit the Google Cloud Platform Website

Search "GCP" or "Google Cloud Platform" into your search engine. Then visit the site:
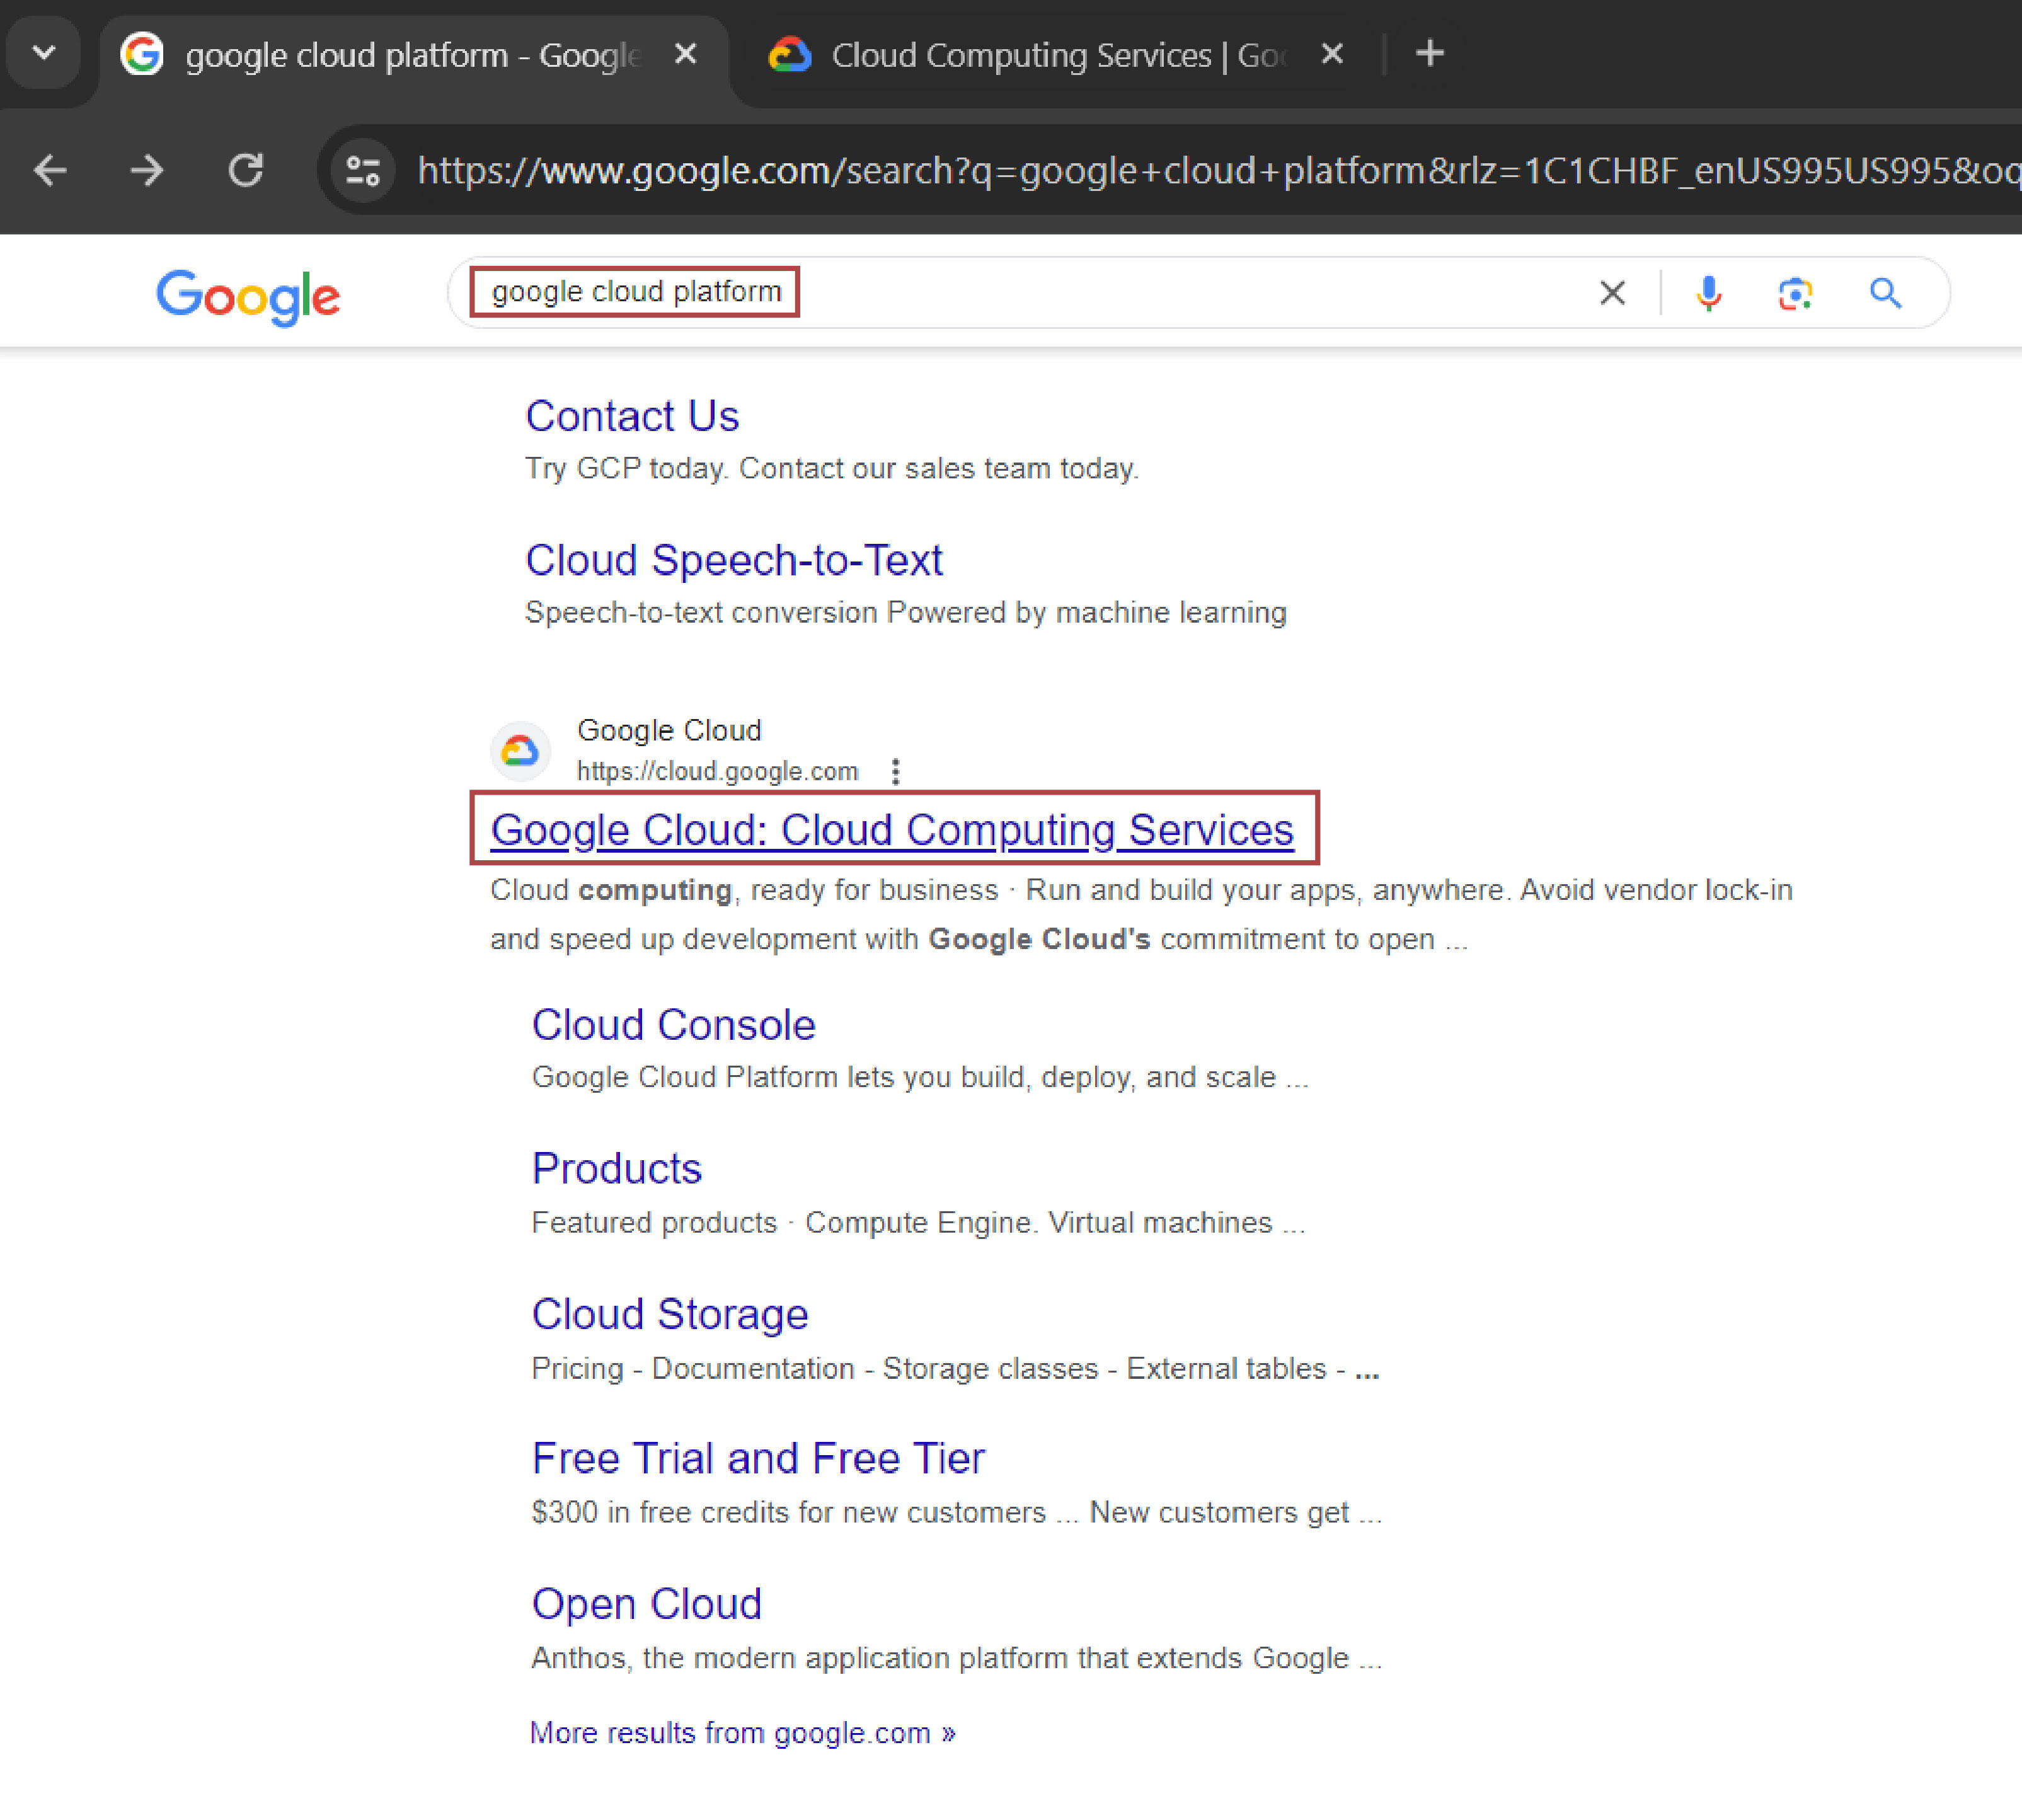
instructions screenshot 1

2. Sign in/ Create an Account

Click Sign In in the upper right hand corner and log in with your email.
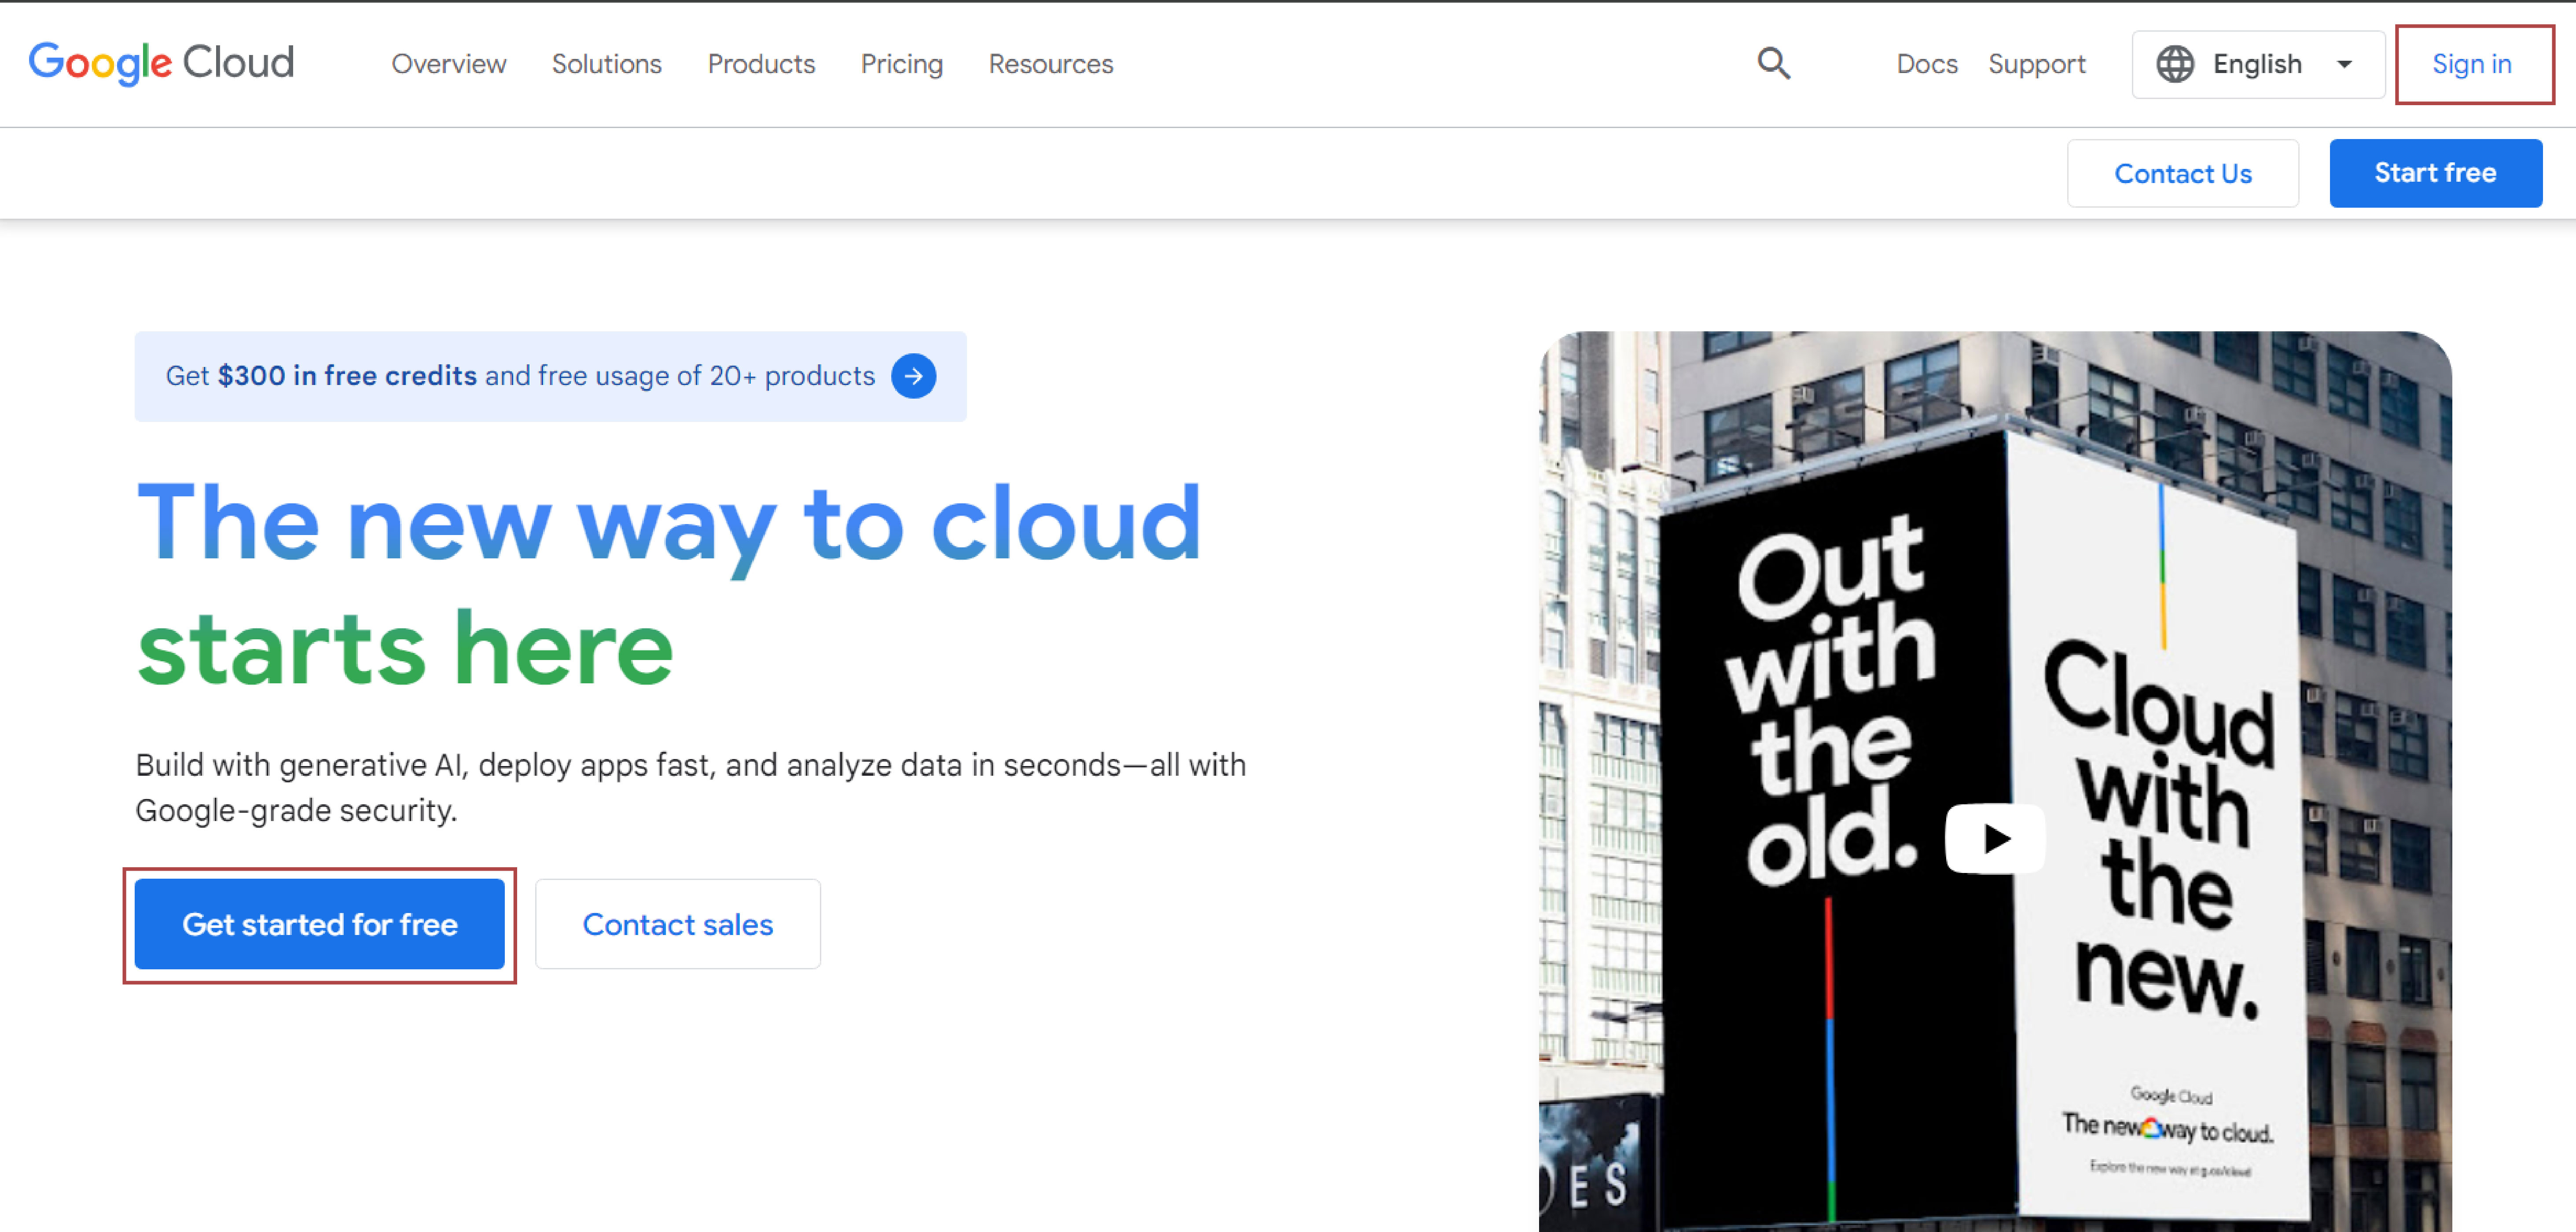
instructions screenshot 2

Next enter your gmail account. click Next, and then enter your password
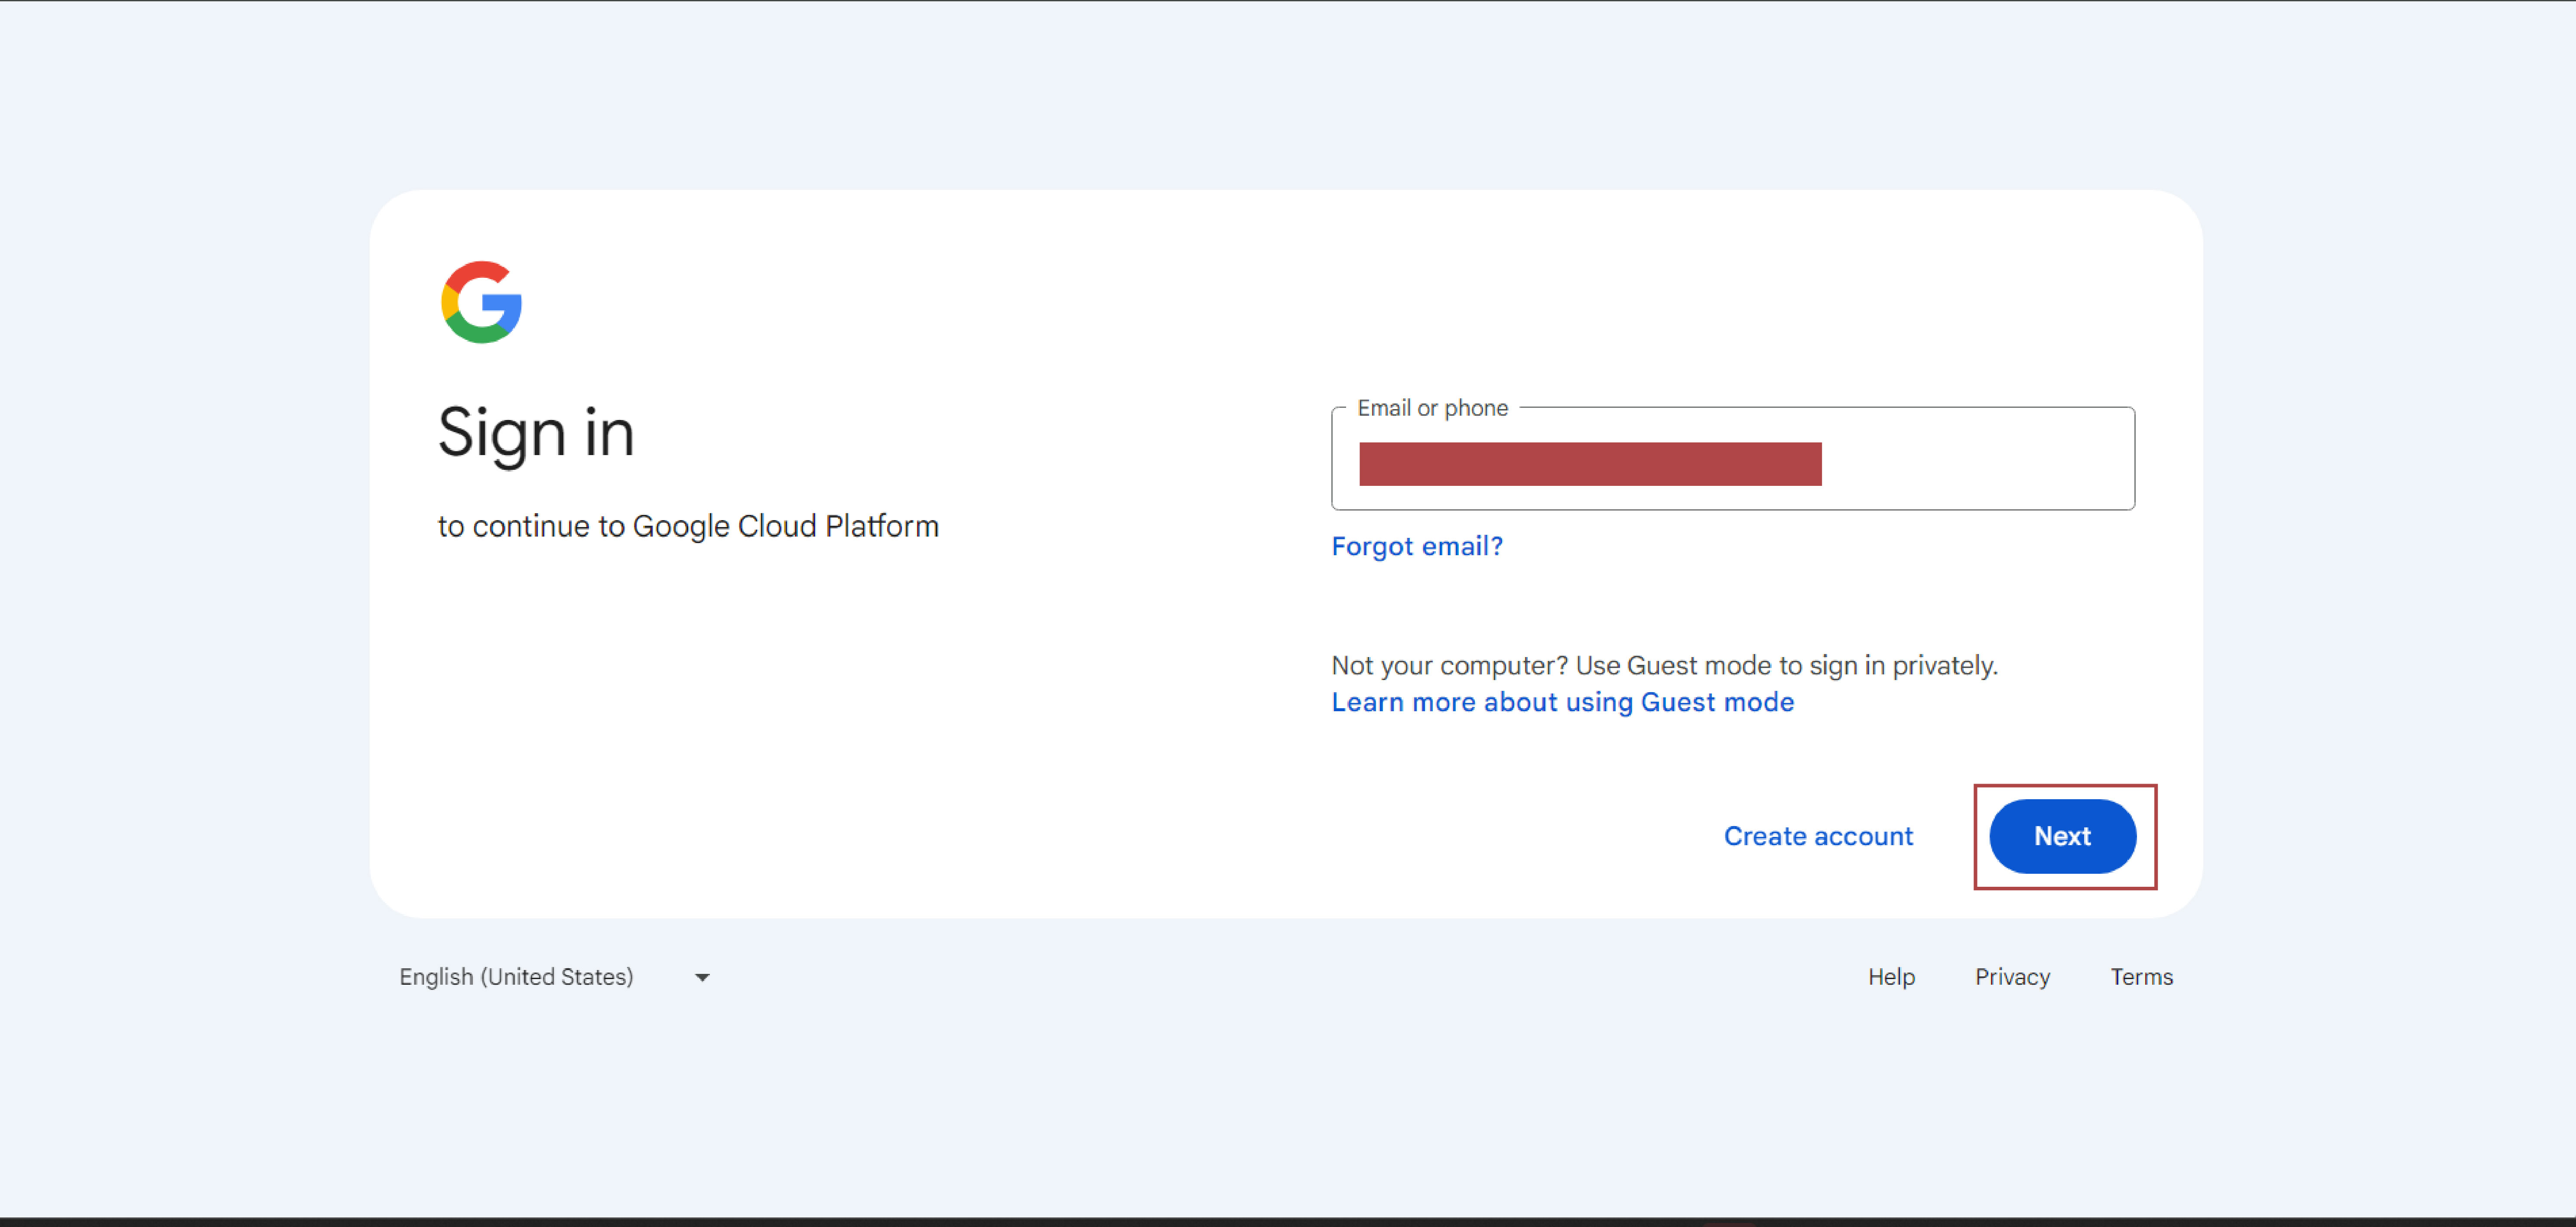
instructions screenshot 3

After you log in, you should see a the home/landing page:
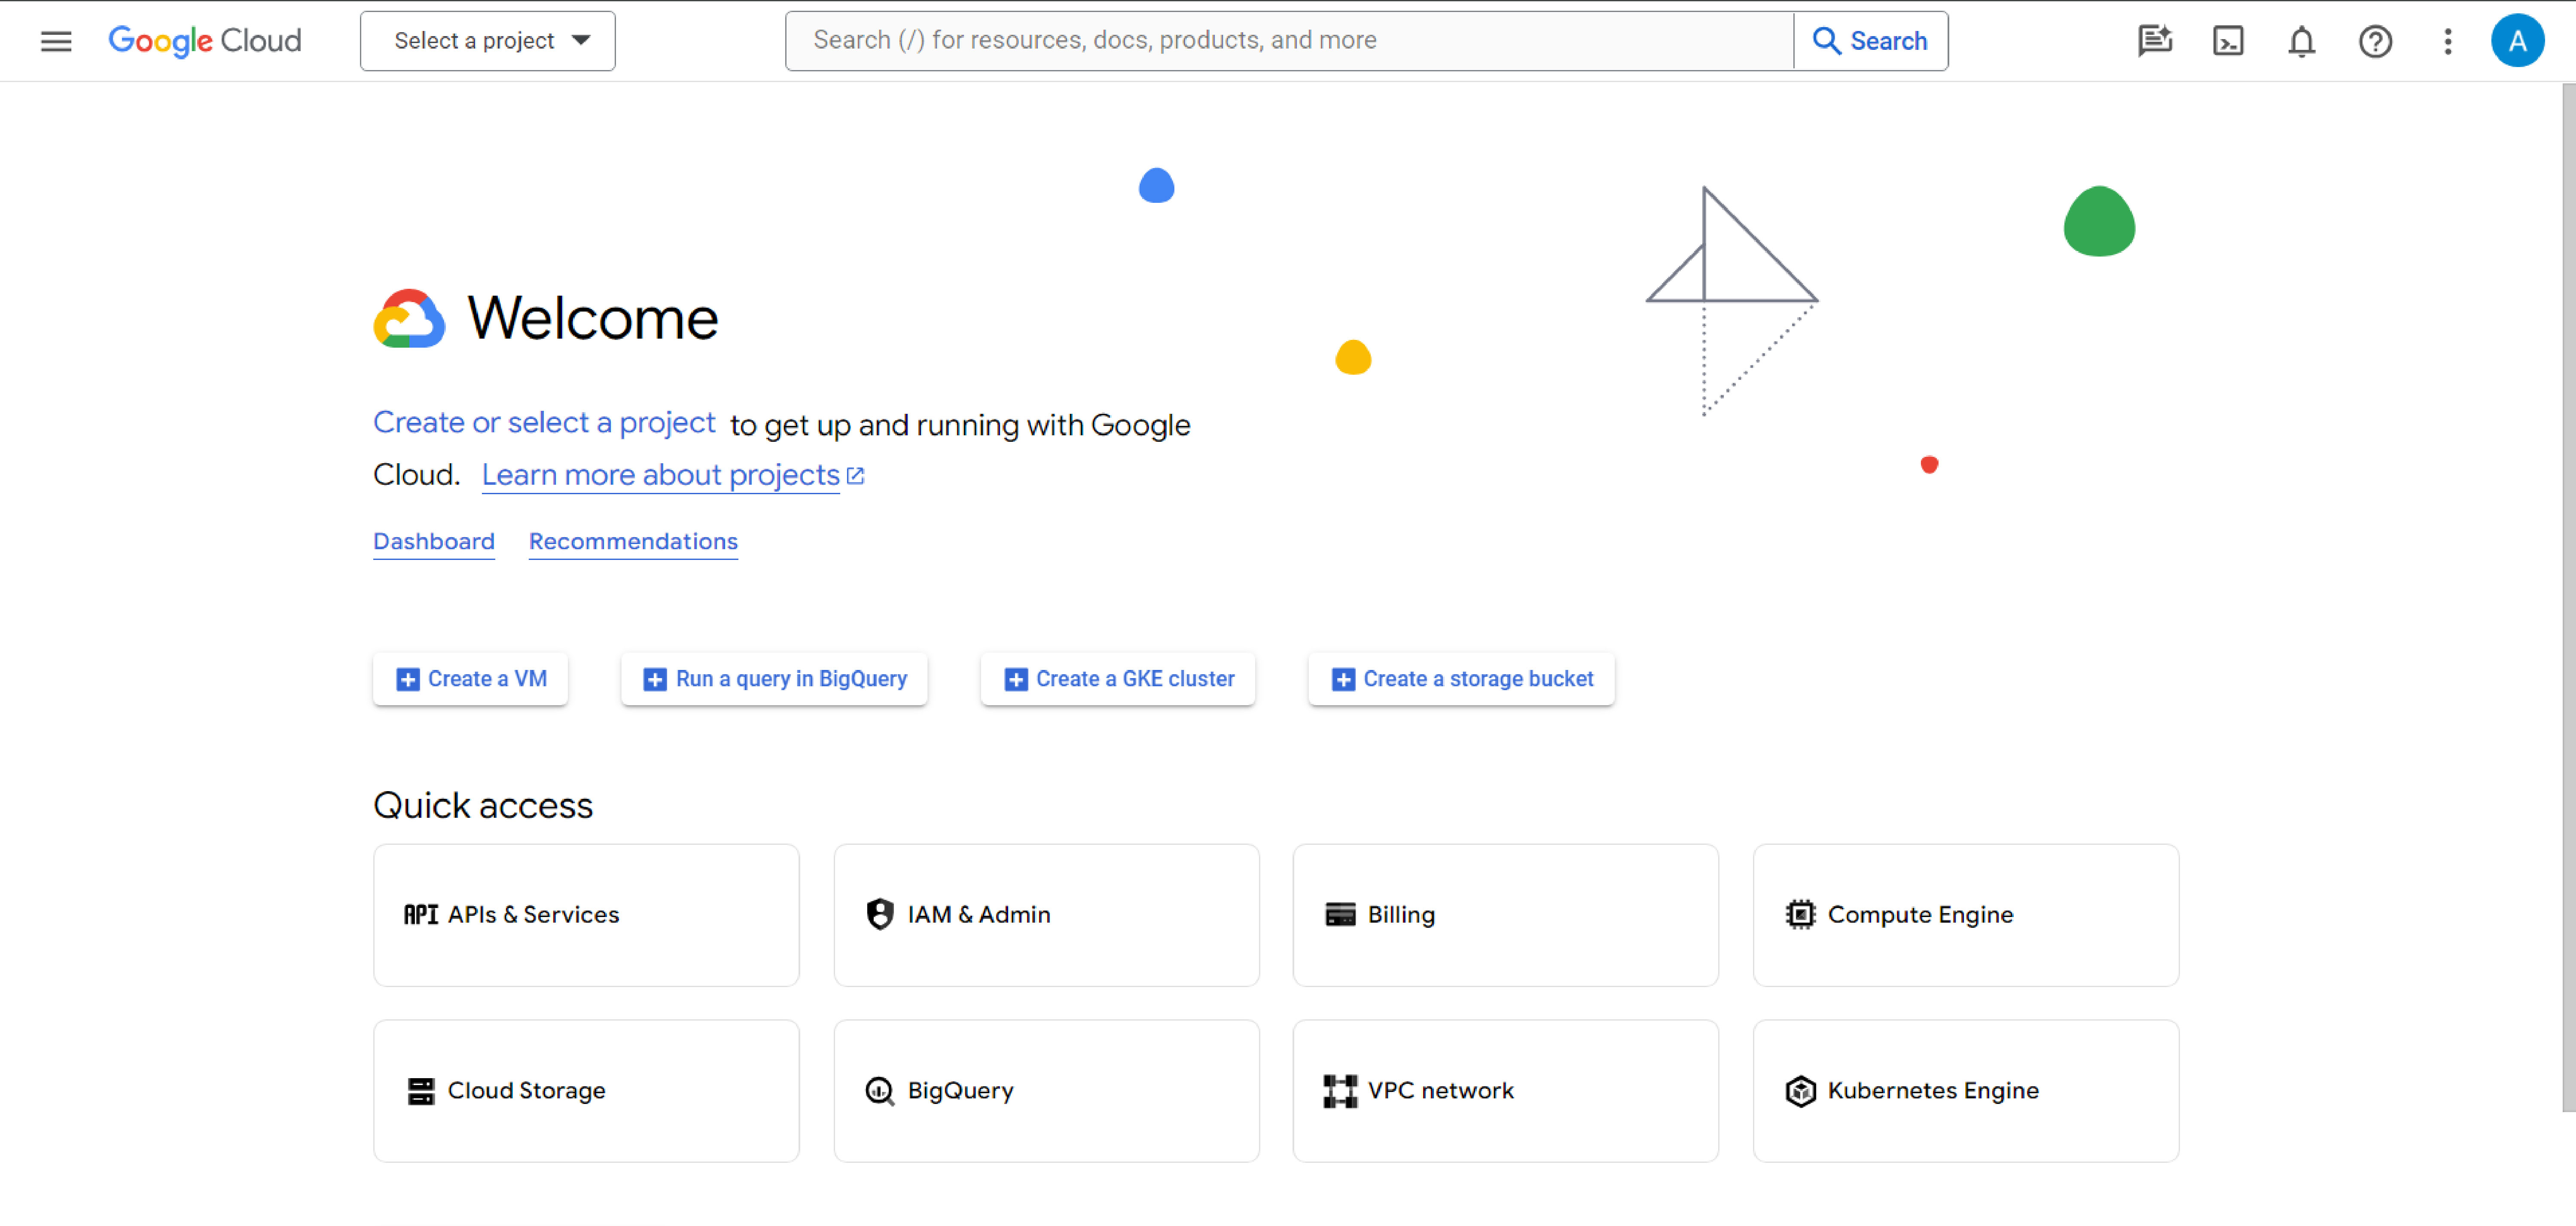
instructions screenshot 4

3. Visit the Identity Access and Management (IAM) section

Click the IAM & Admin tile or search it in the console search bar.
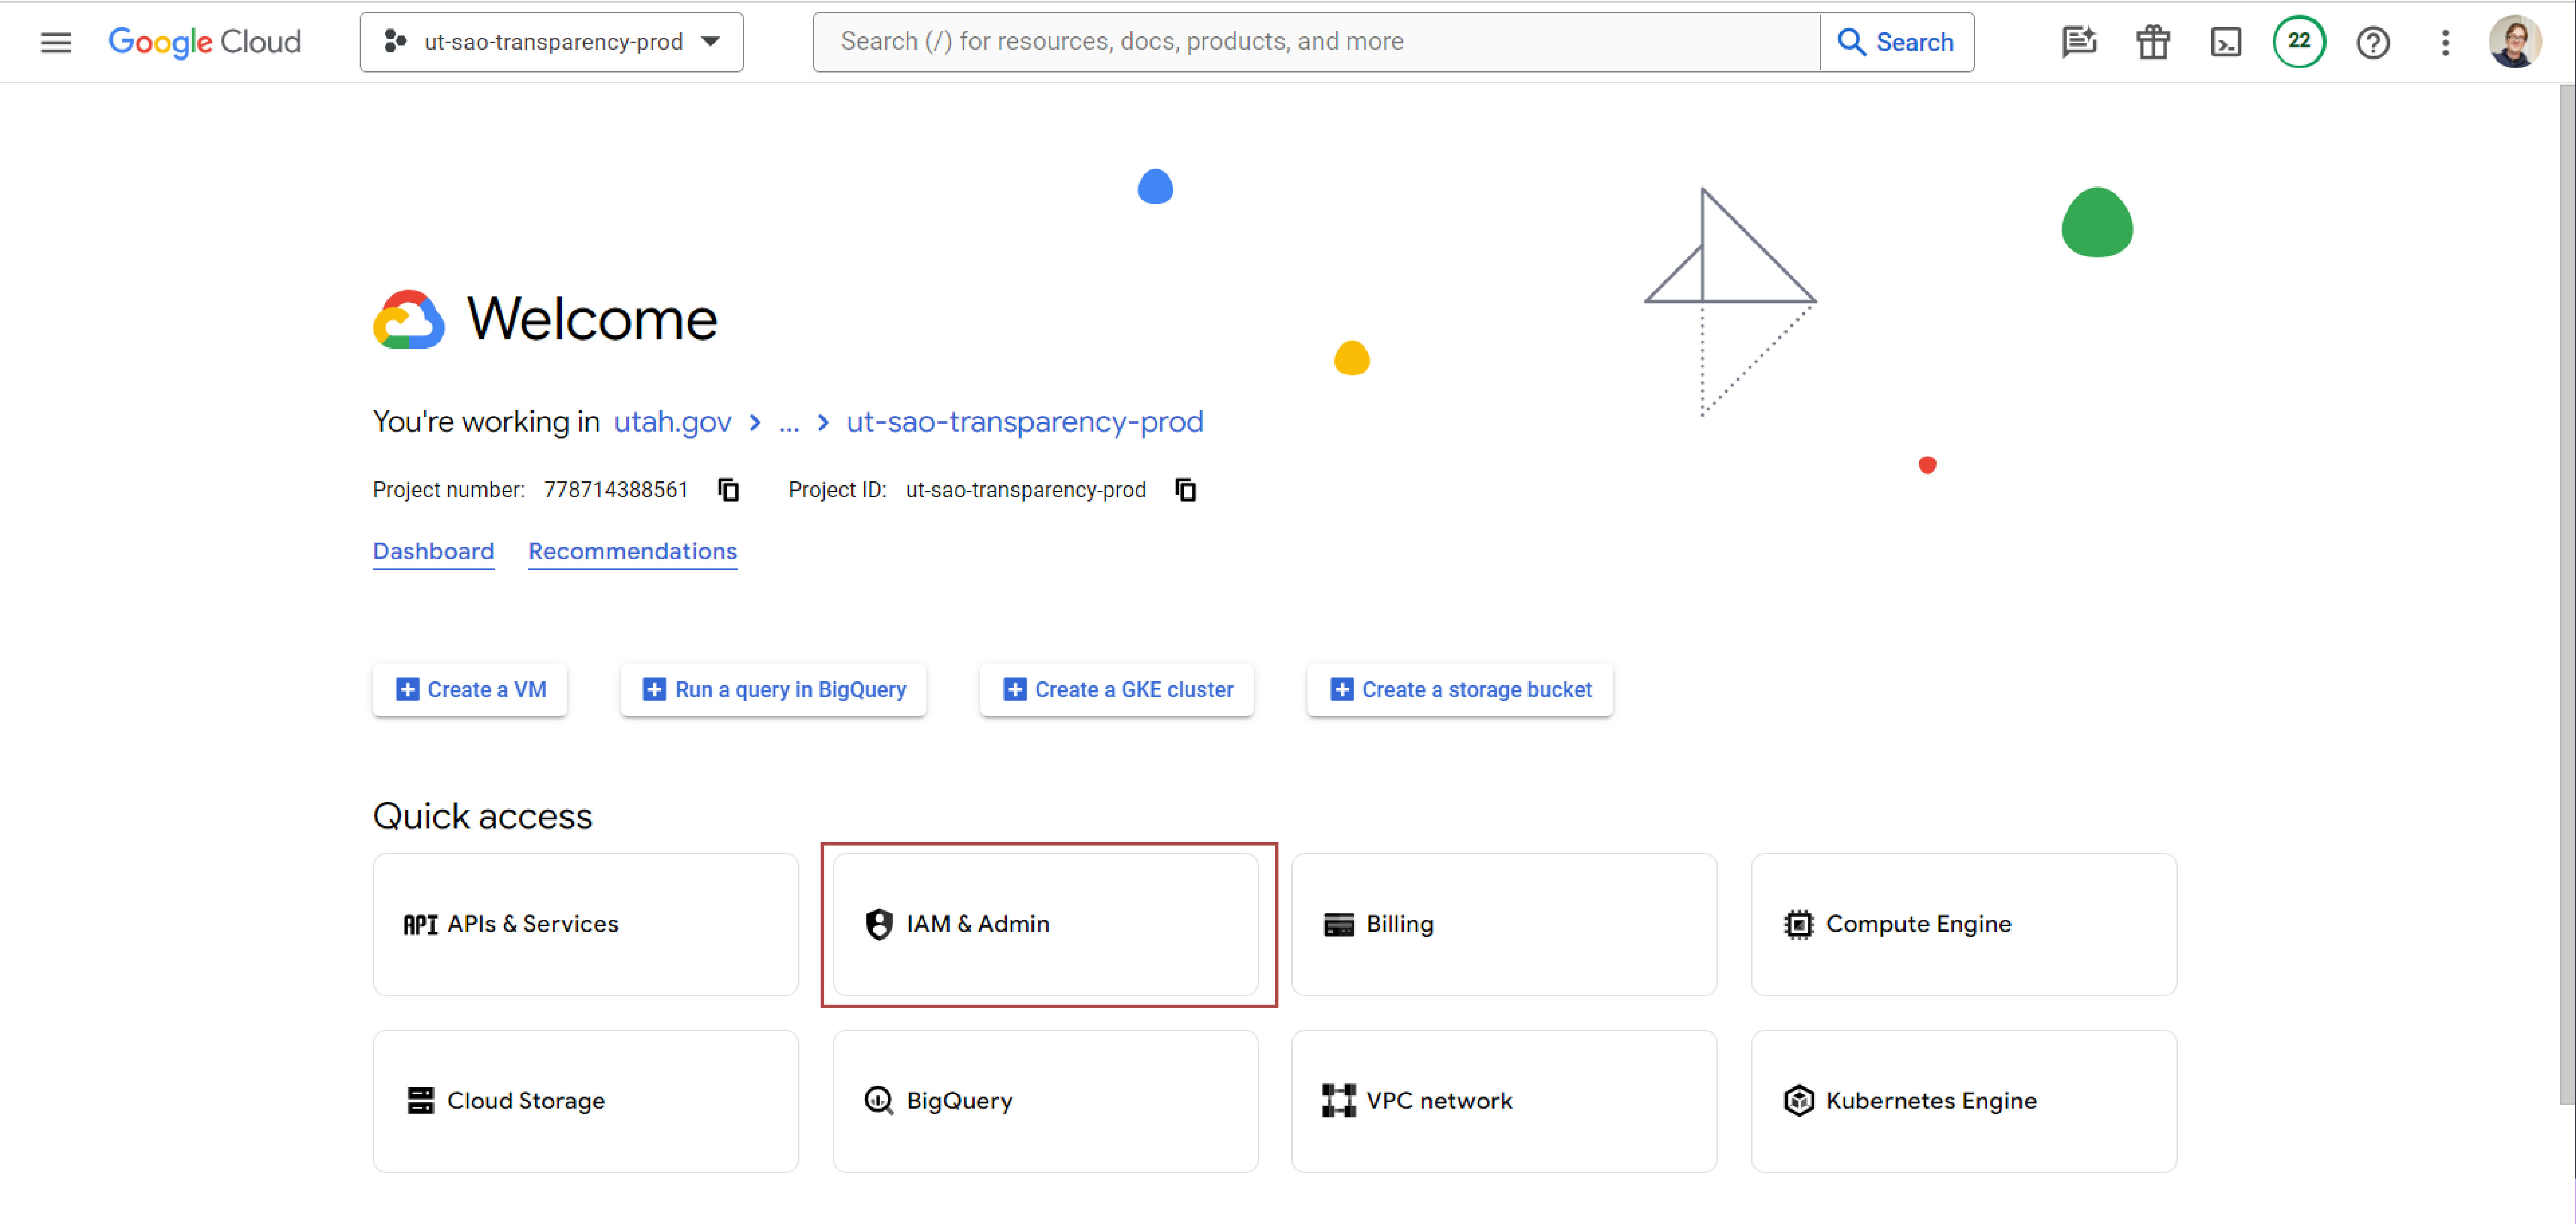
instructions screenshot 5

4. Visit Service Account section

On the left hand navigation, click "Service Accounts"
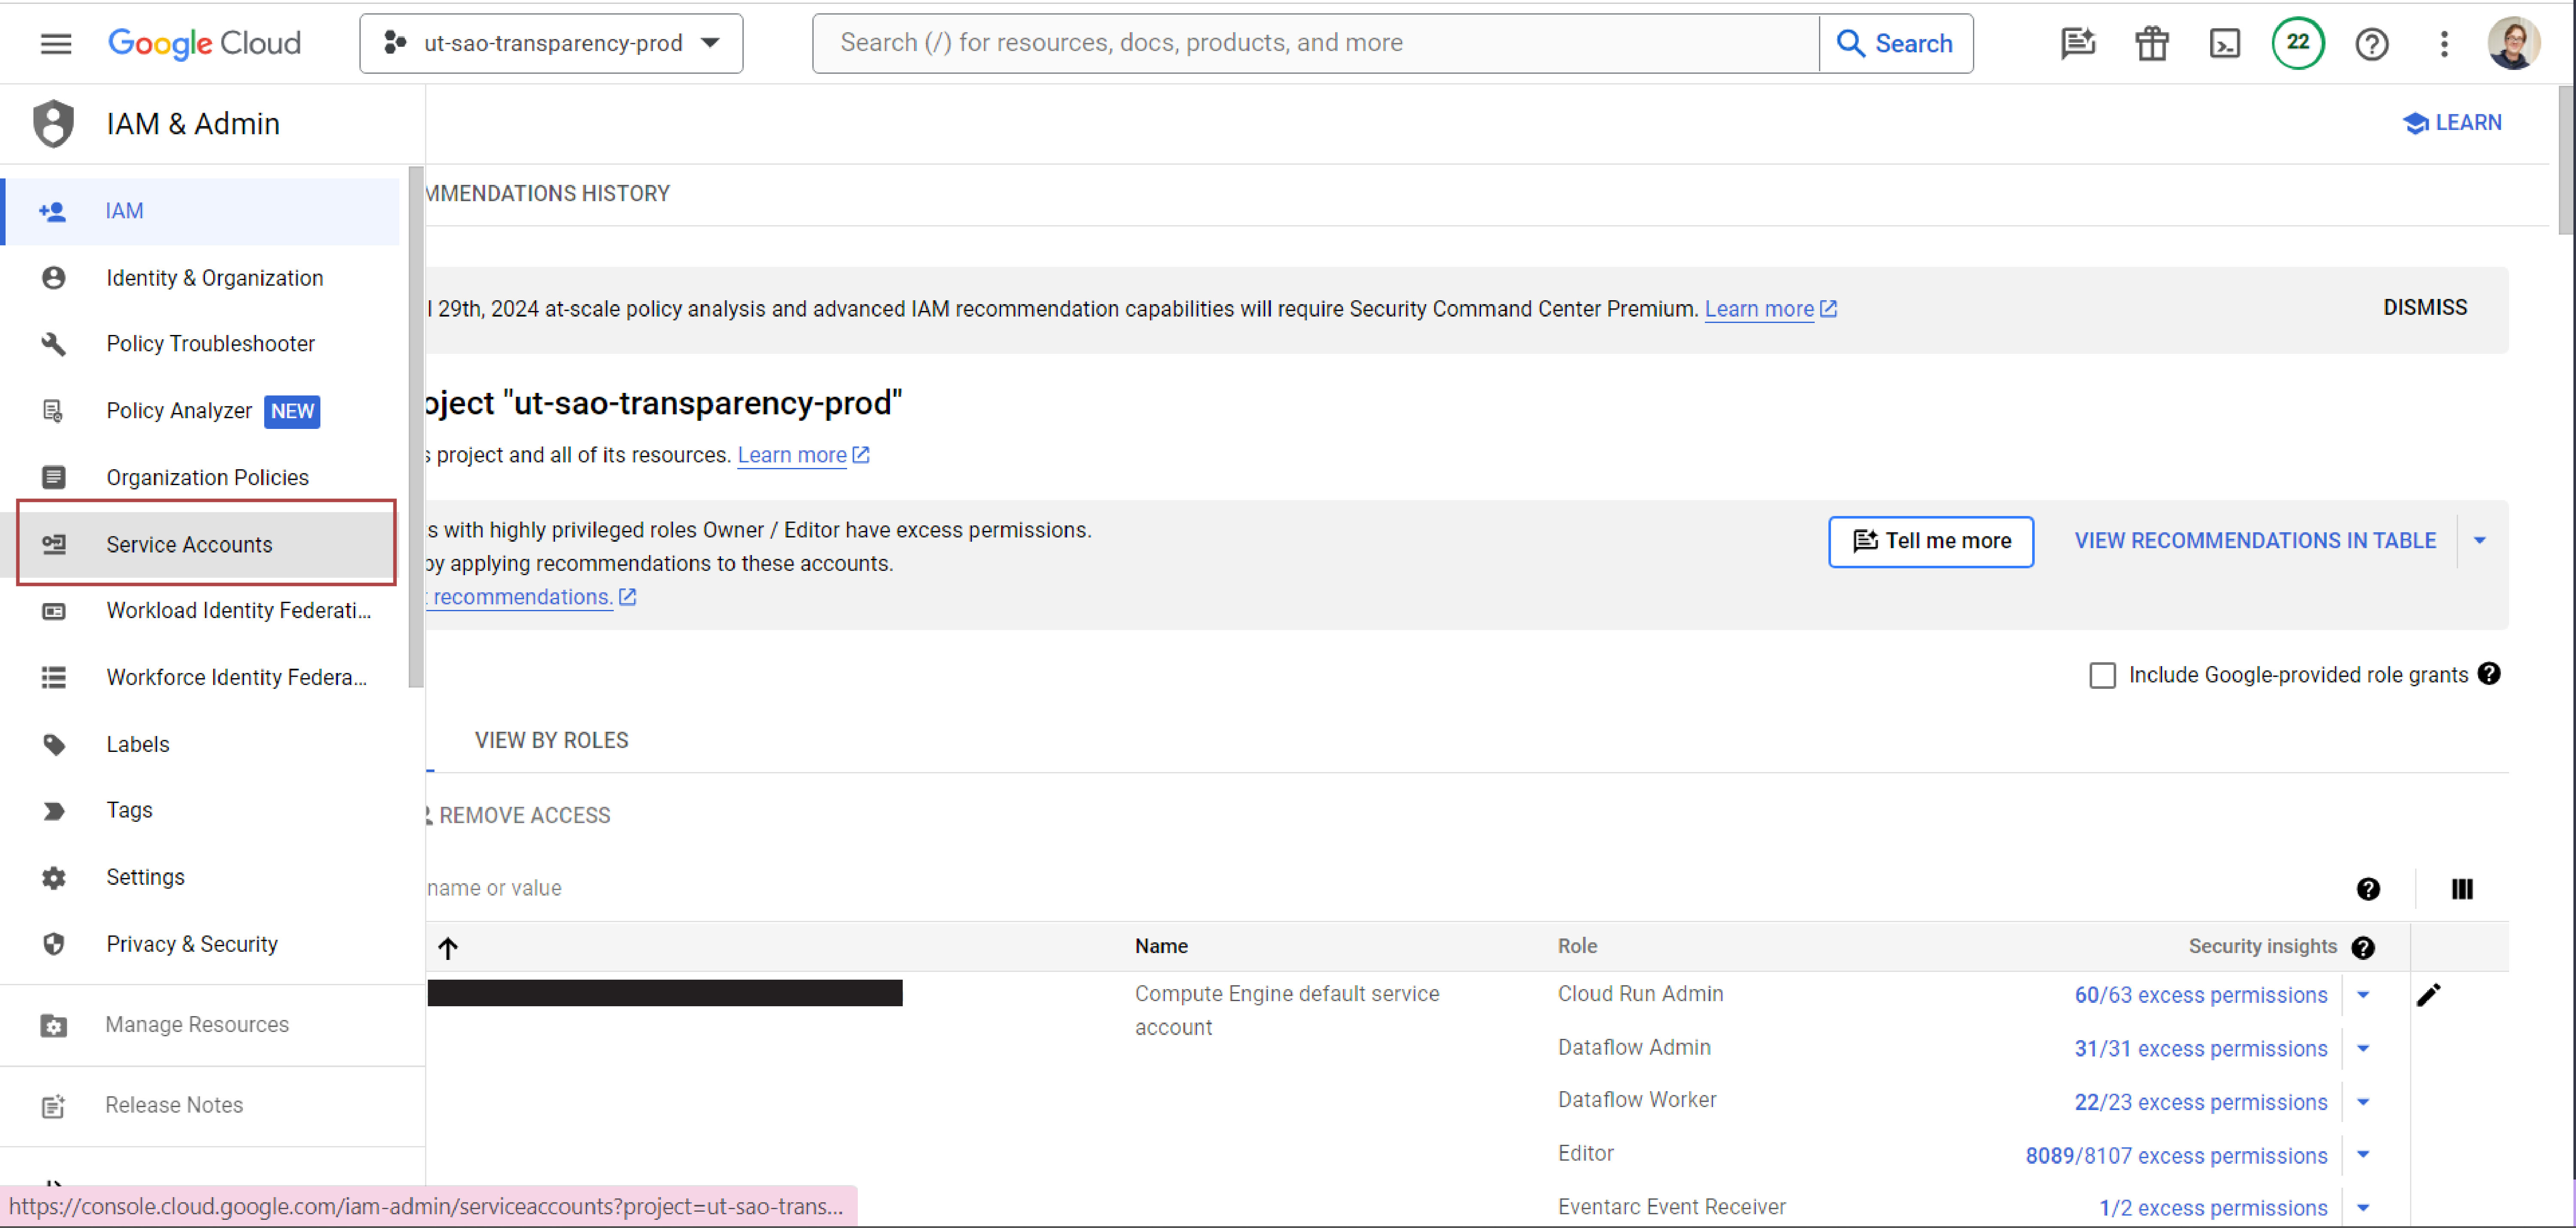
instructions screenshot 6

5. Create a New Service Account

In the upper left hand section of the page click the "+ Create Service Account" button.
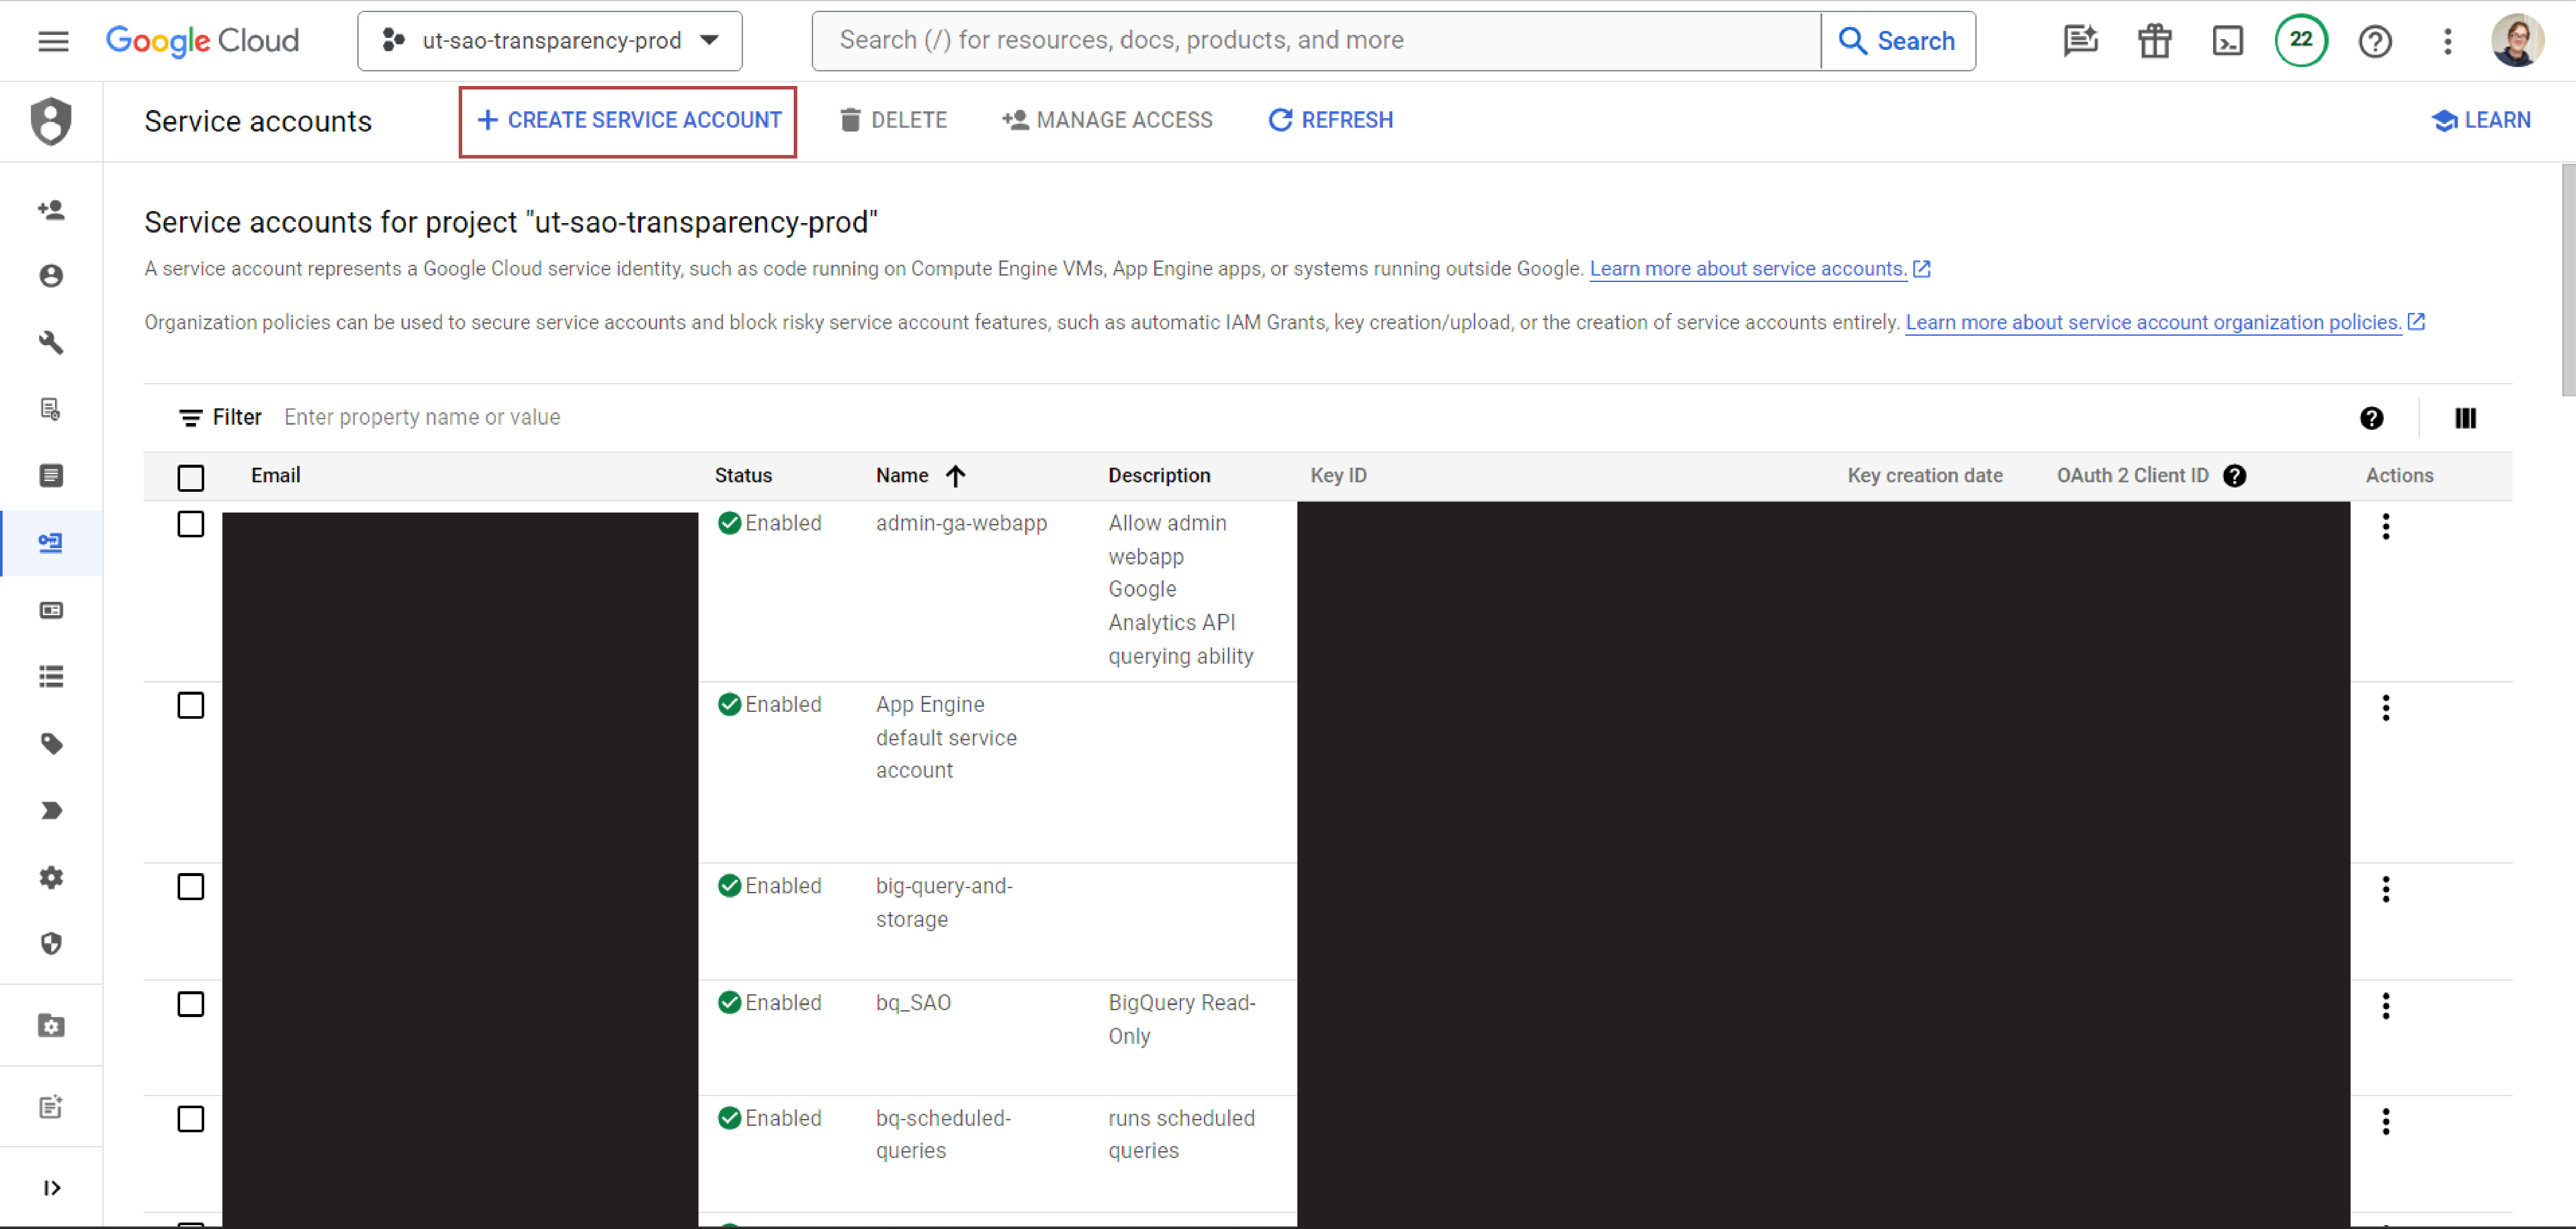
instructions screenshot 7

6. Create a New Service Account

Enter a name and description for the service account. Then click "Create and Continue"
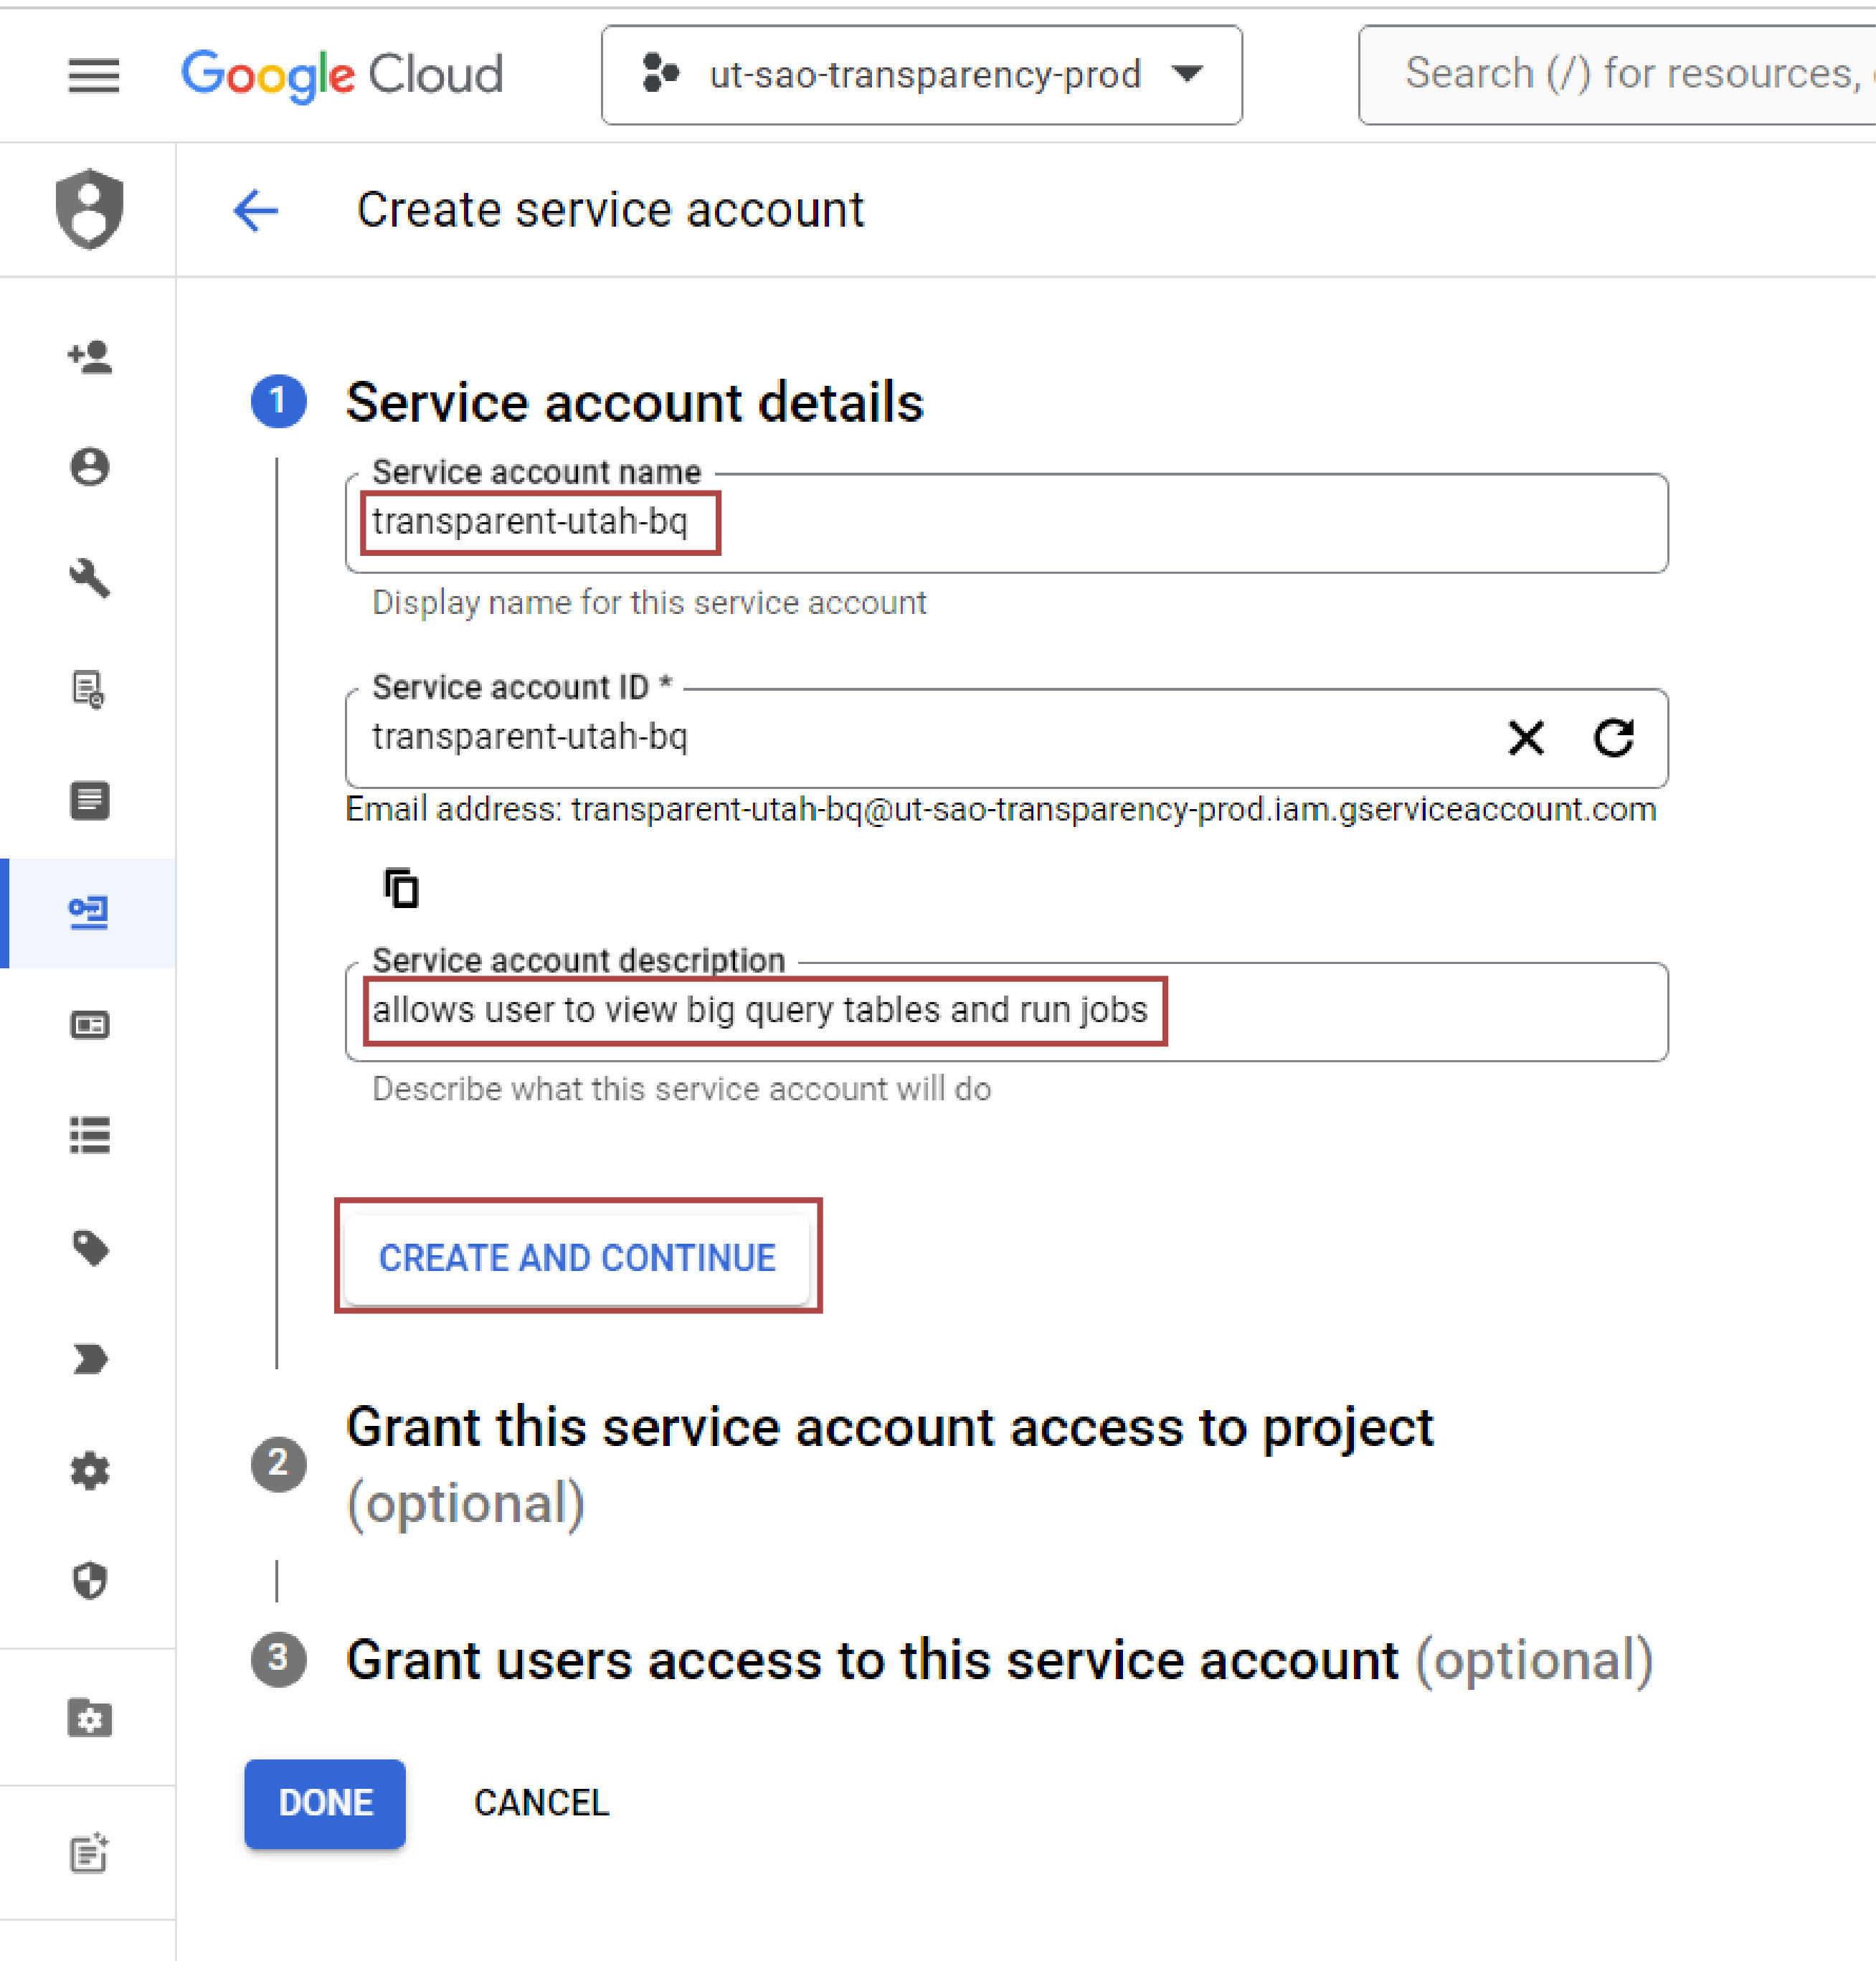
instructions screenshot 8

7. Assign roles/permissions

We need to assign two permissions to the service account. First, scroll to "Big Query" and then select the "BigQuery Data Viewer" role. This lets your service account view data in Big Query.
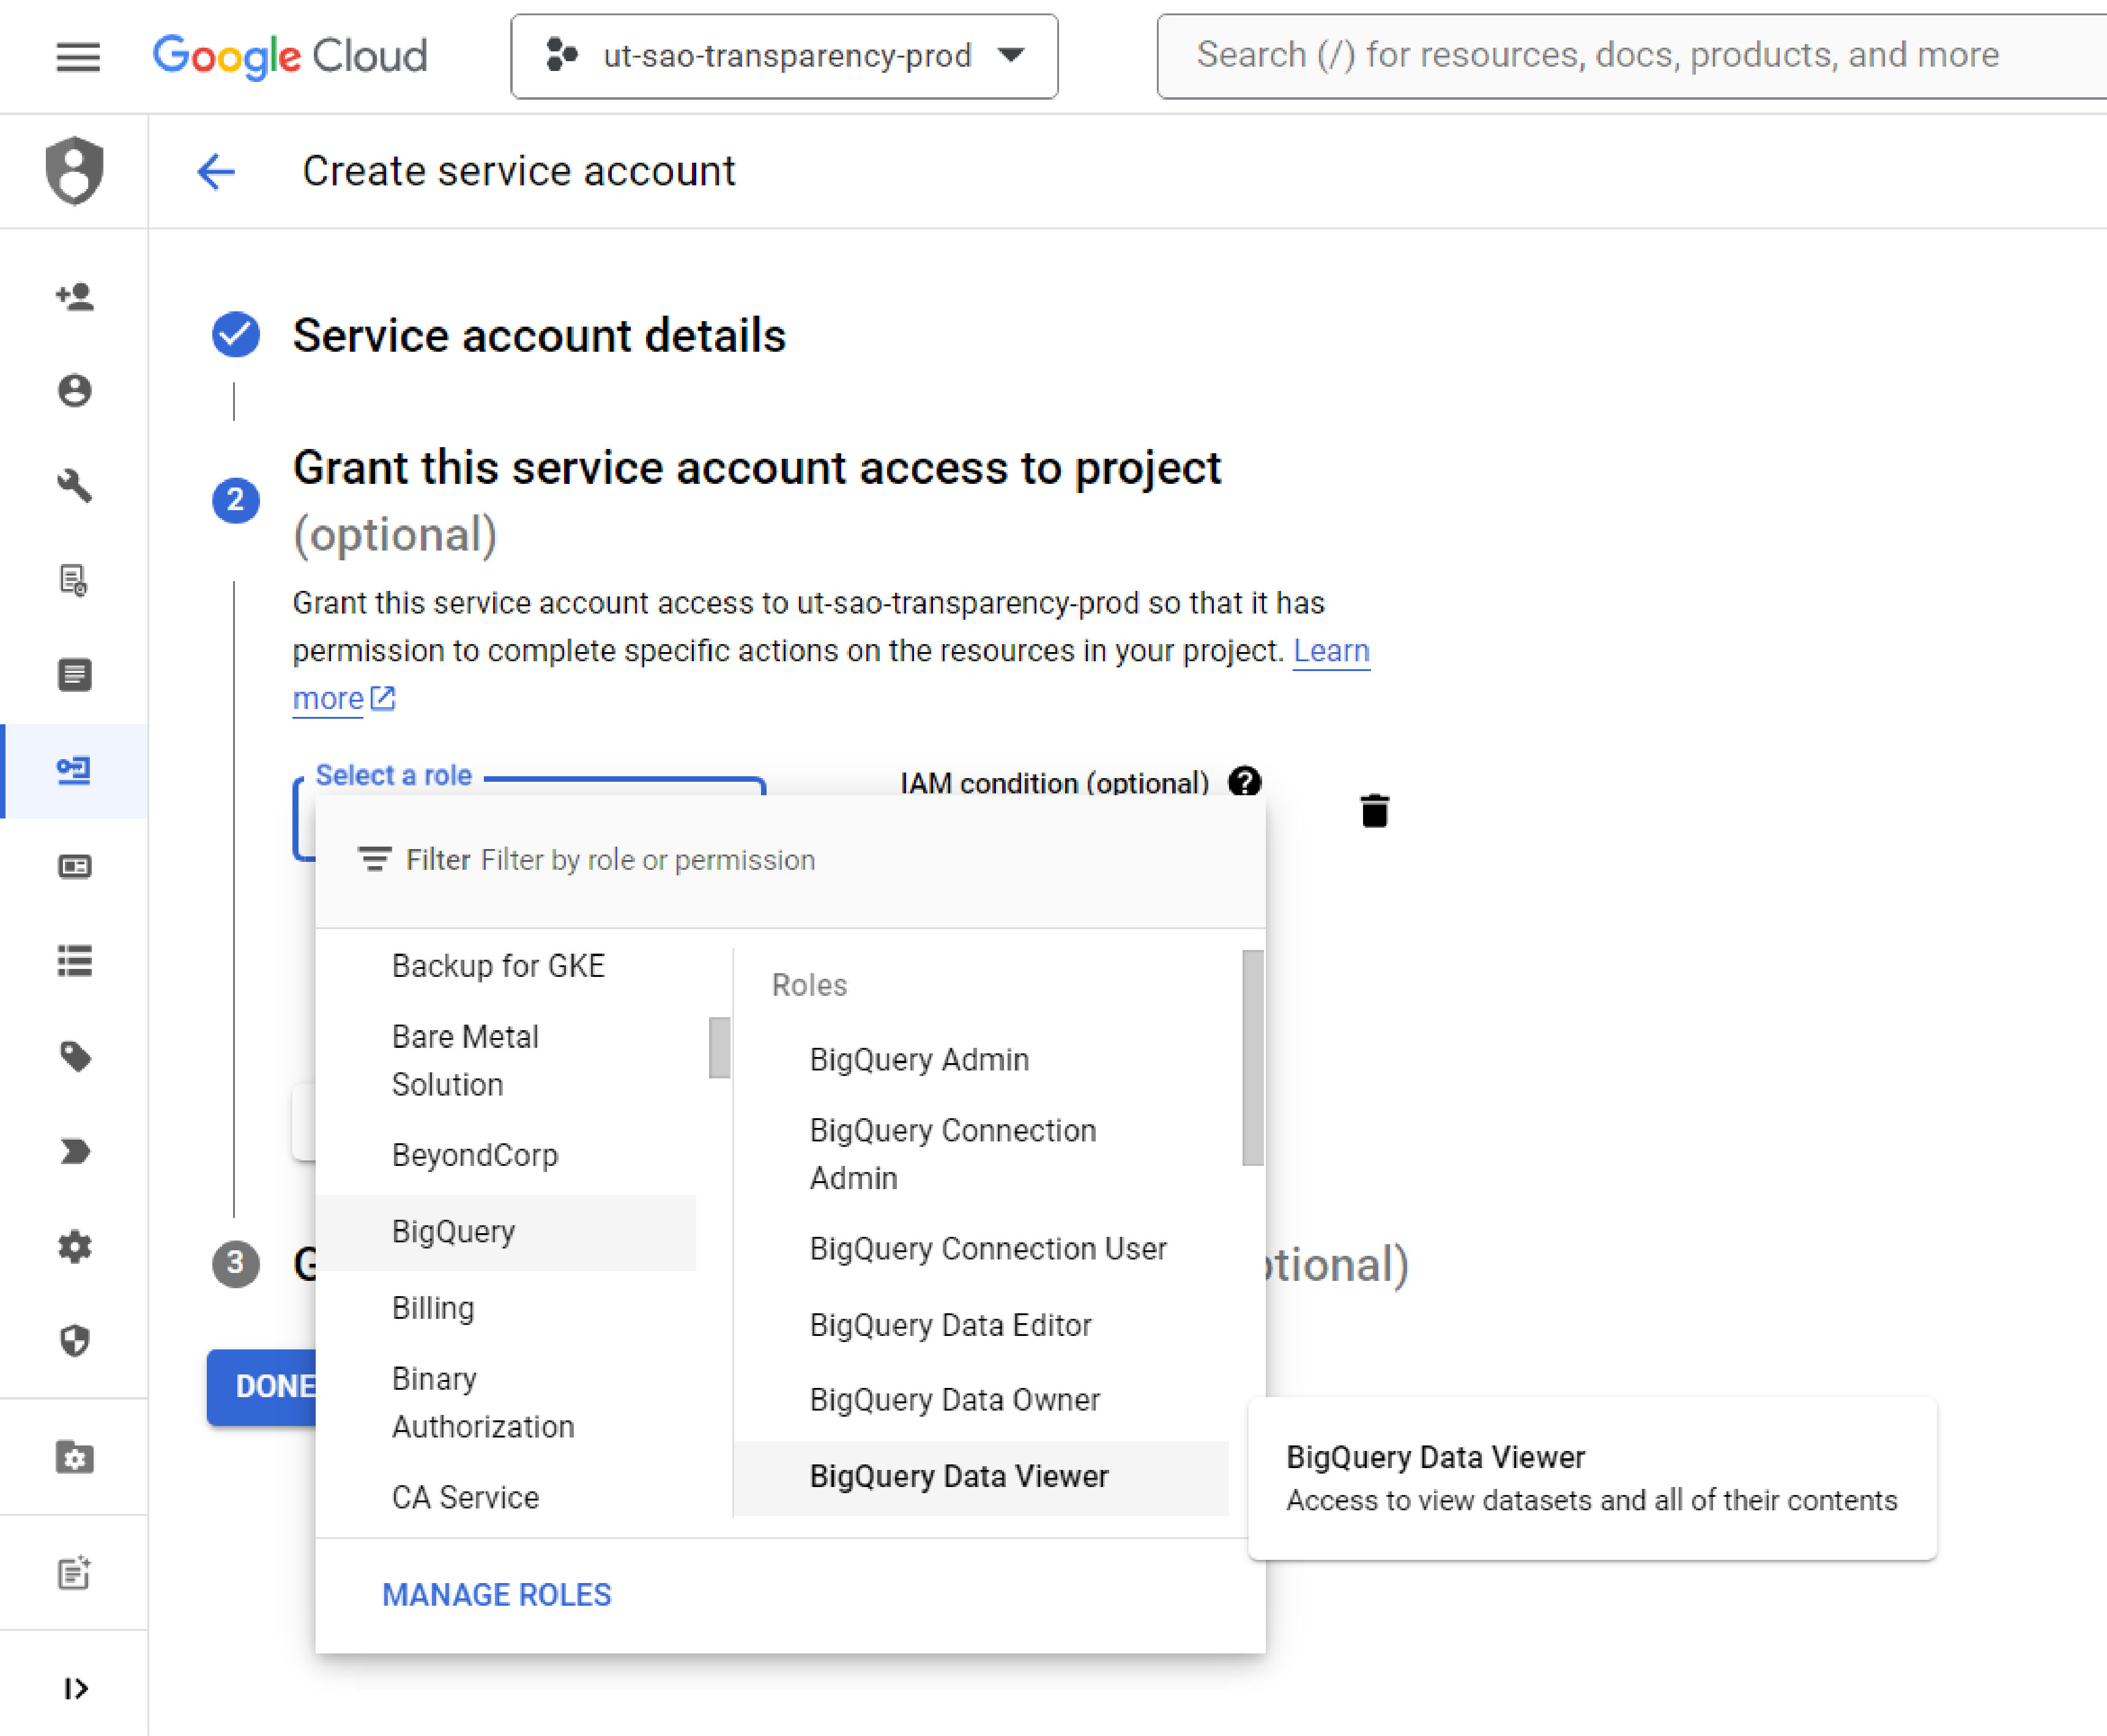
instructions screenshot 9

Next, scroll to "Big Query" again and then select the "Big Query User" role. This role lets you execute queries, run jobs, and see metadata. To finish creating the service account click the "Done" button.
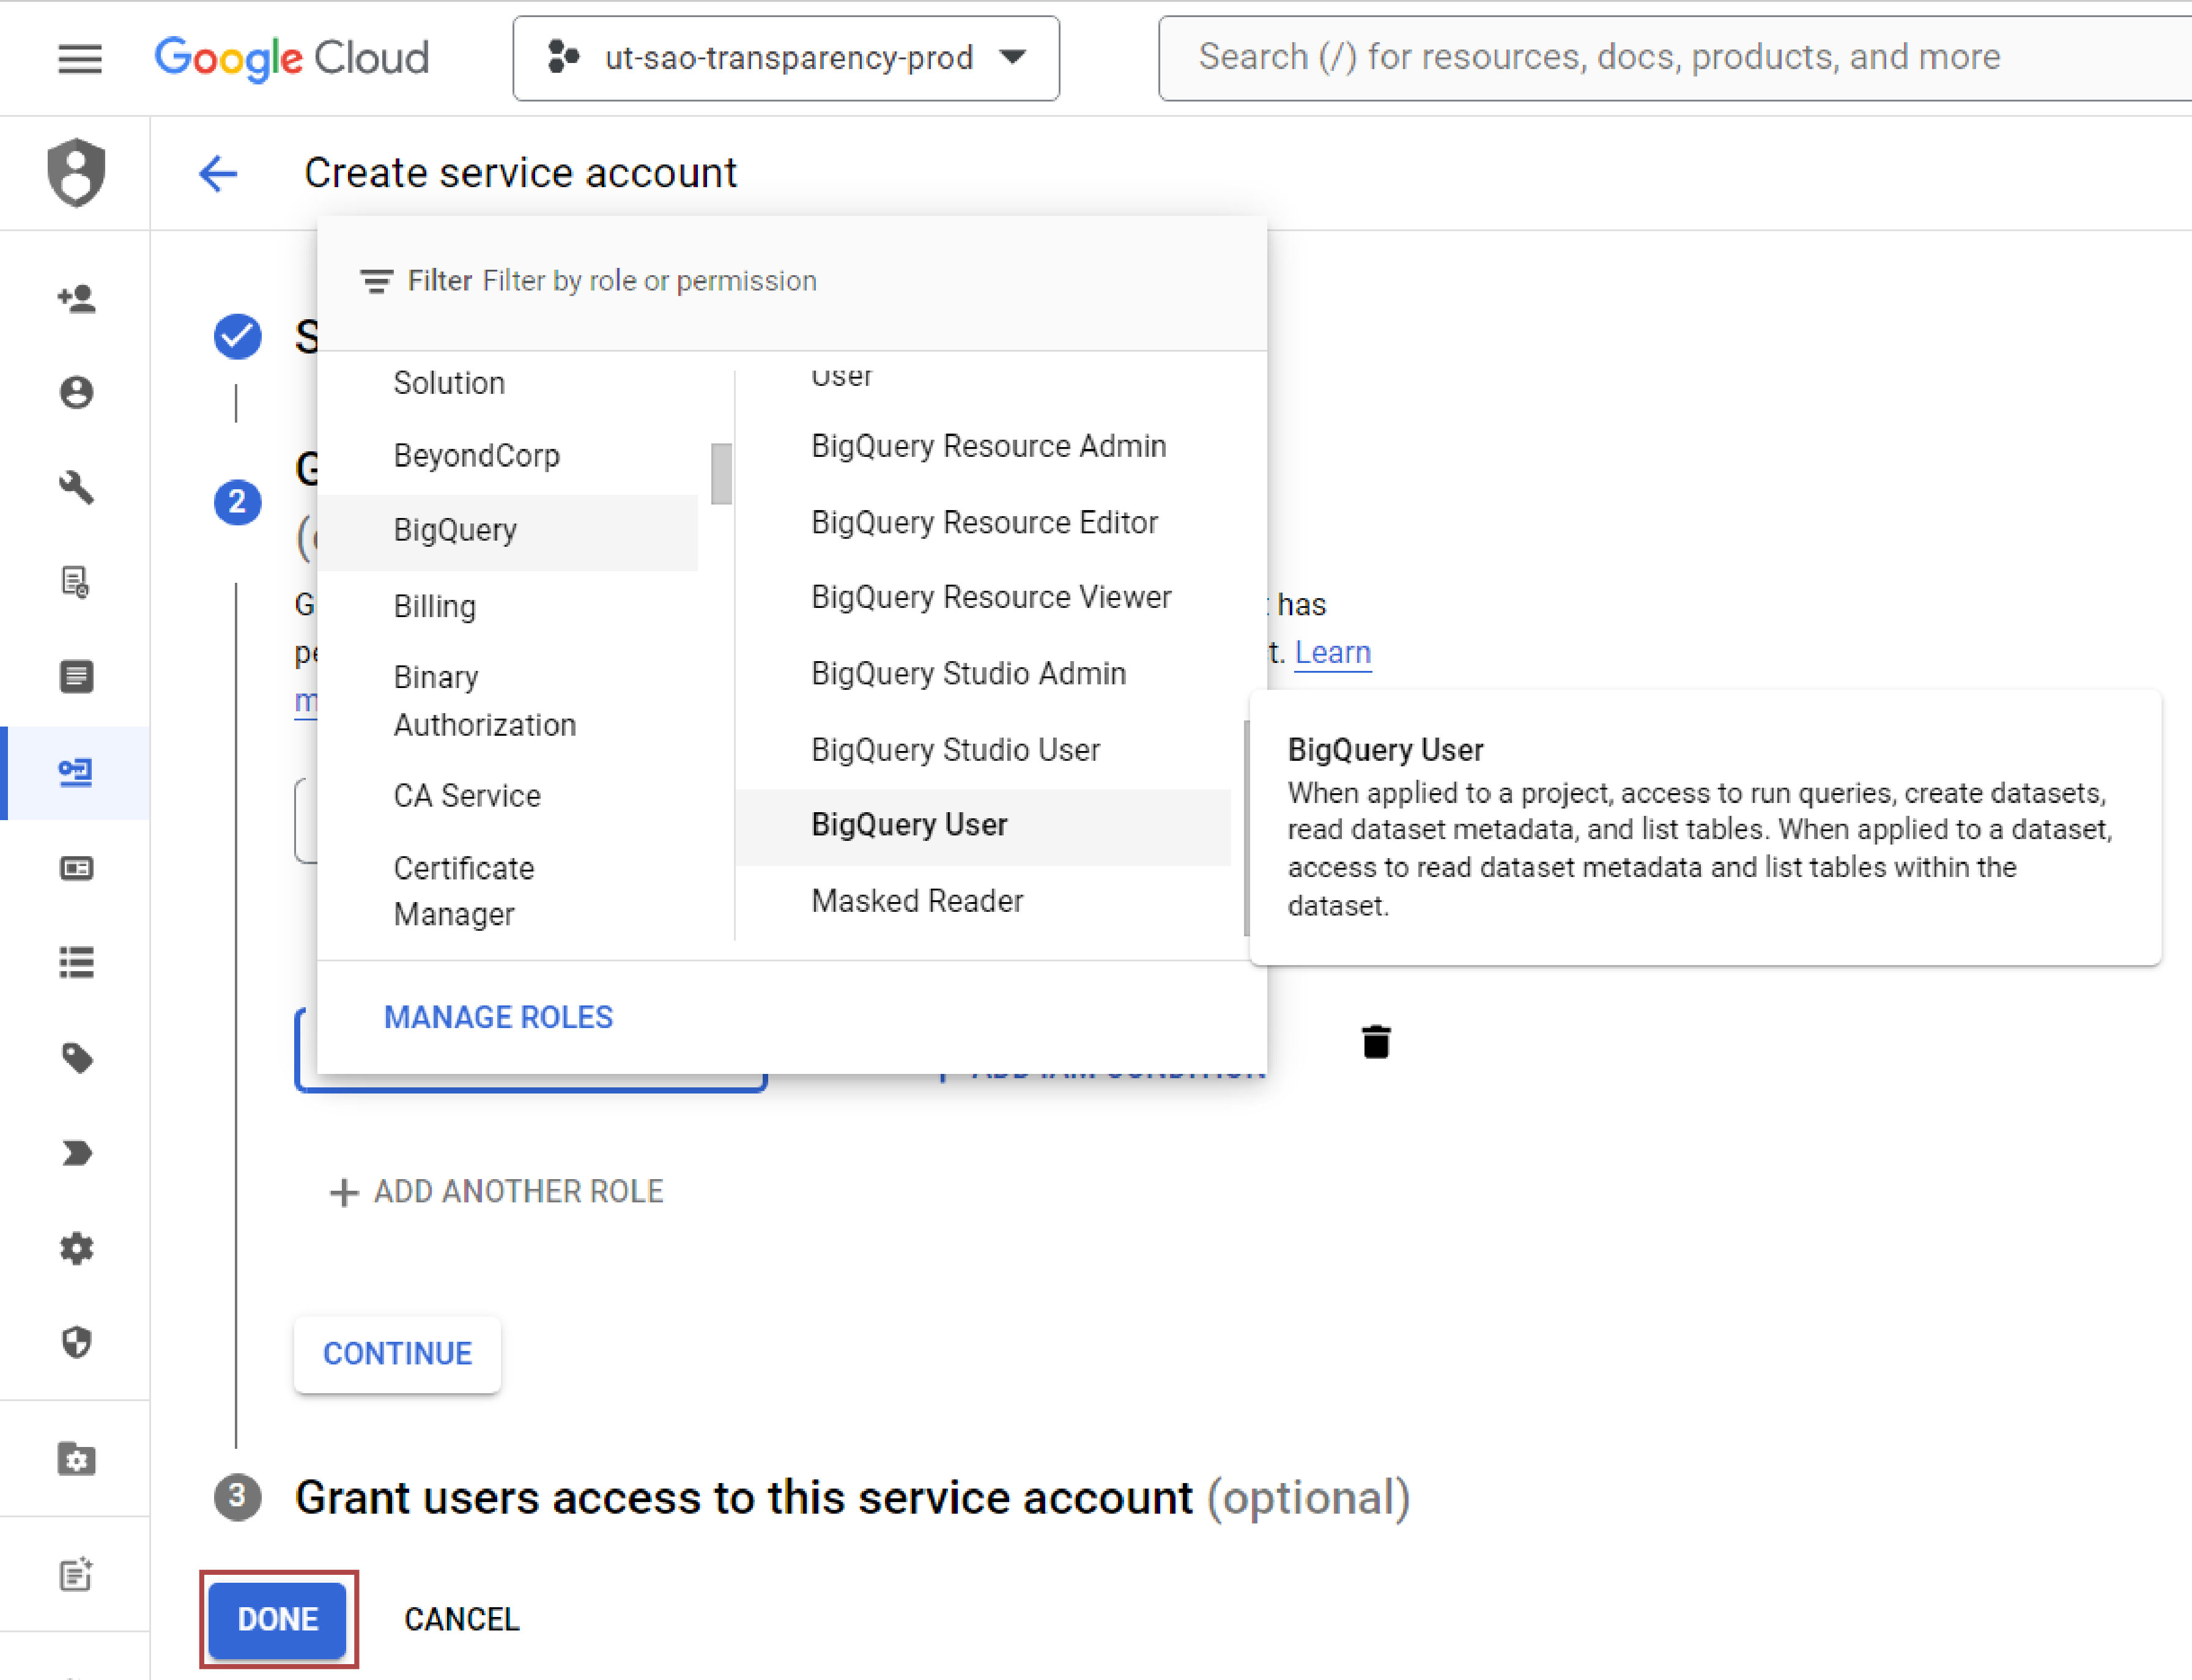
instructions screenshot 10

8. Download a Service Account key

In the Service Account menu, now scroll untill you locate the service account you just created. Then click its name.
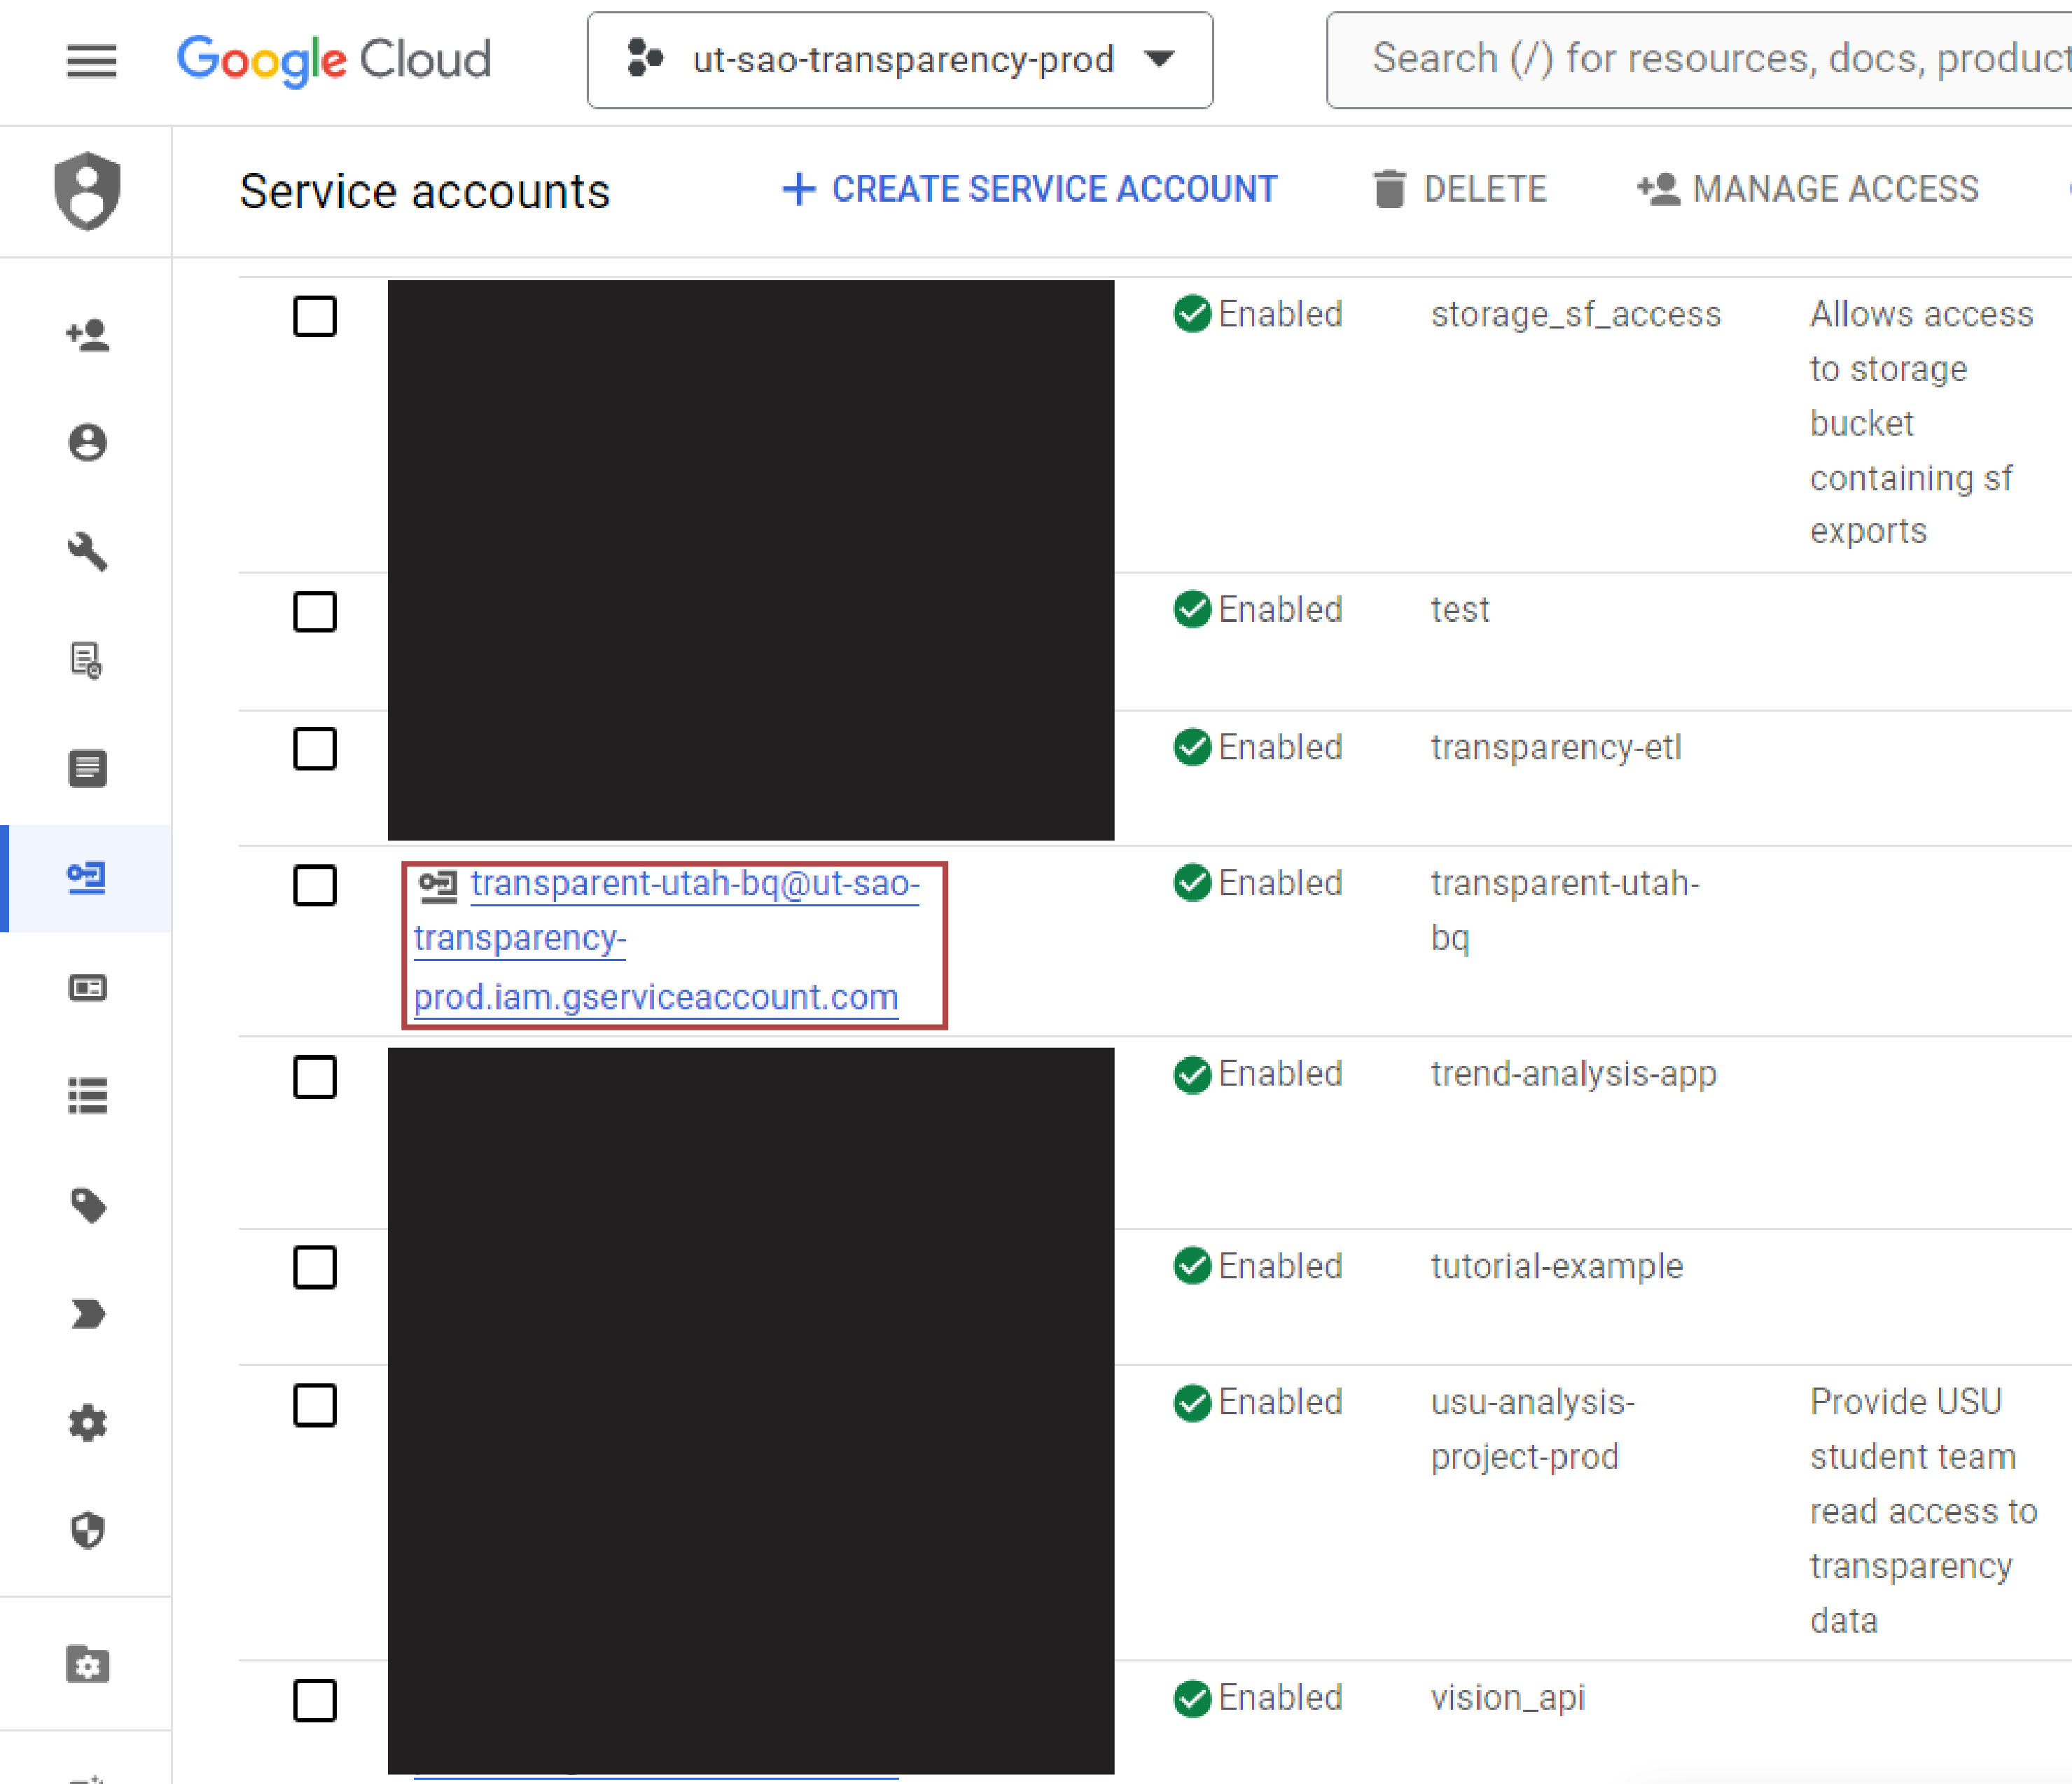
instructions screenshot 11

Go to the Keys section. Then click "Add Key" and "Create new Key".
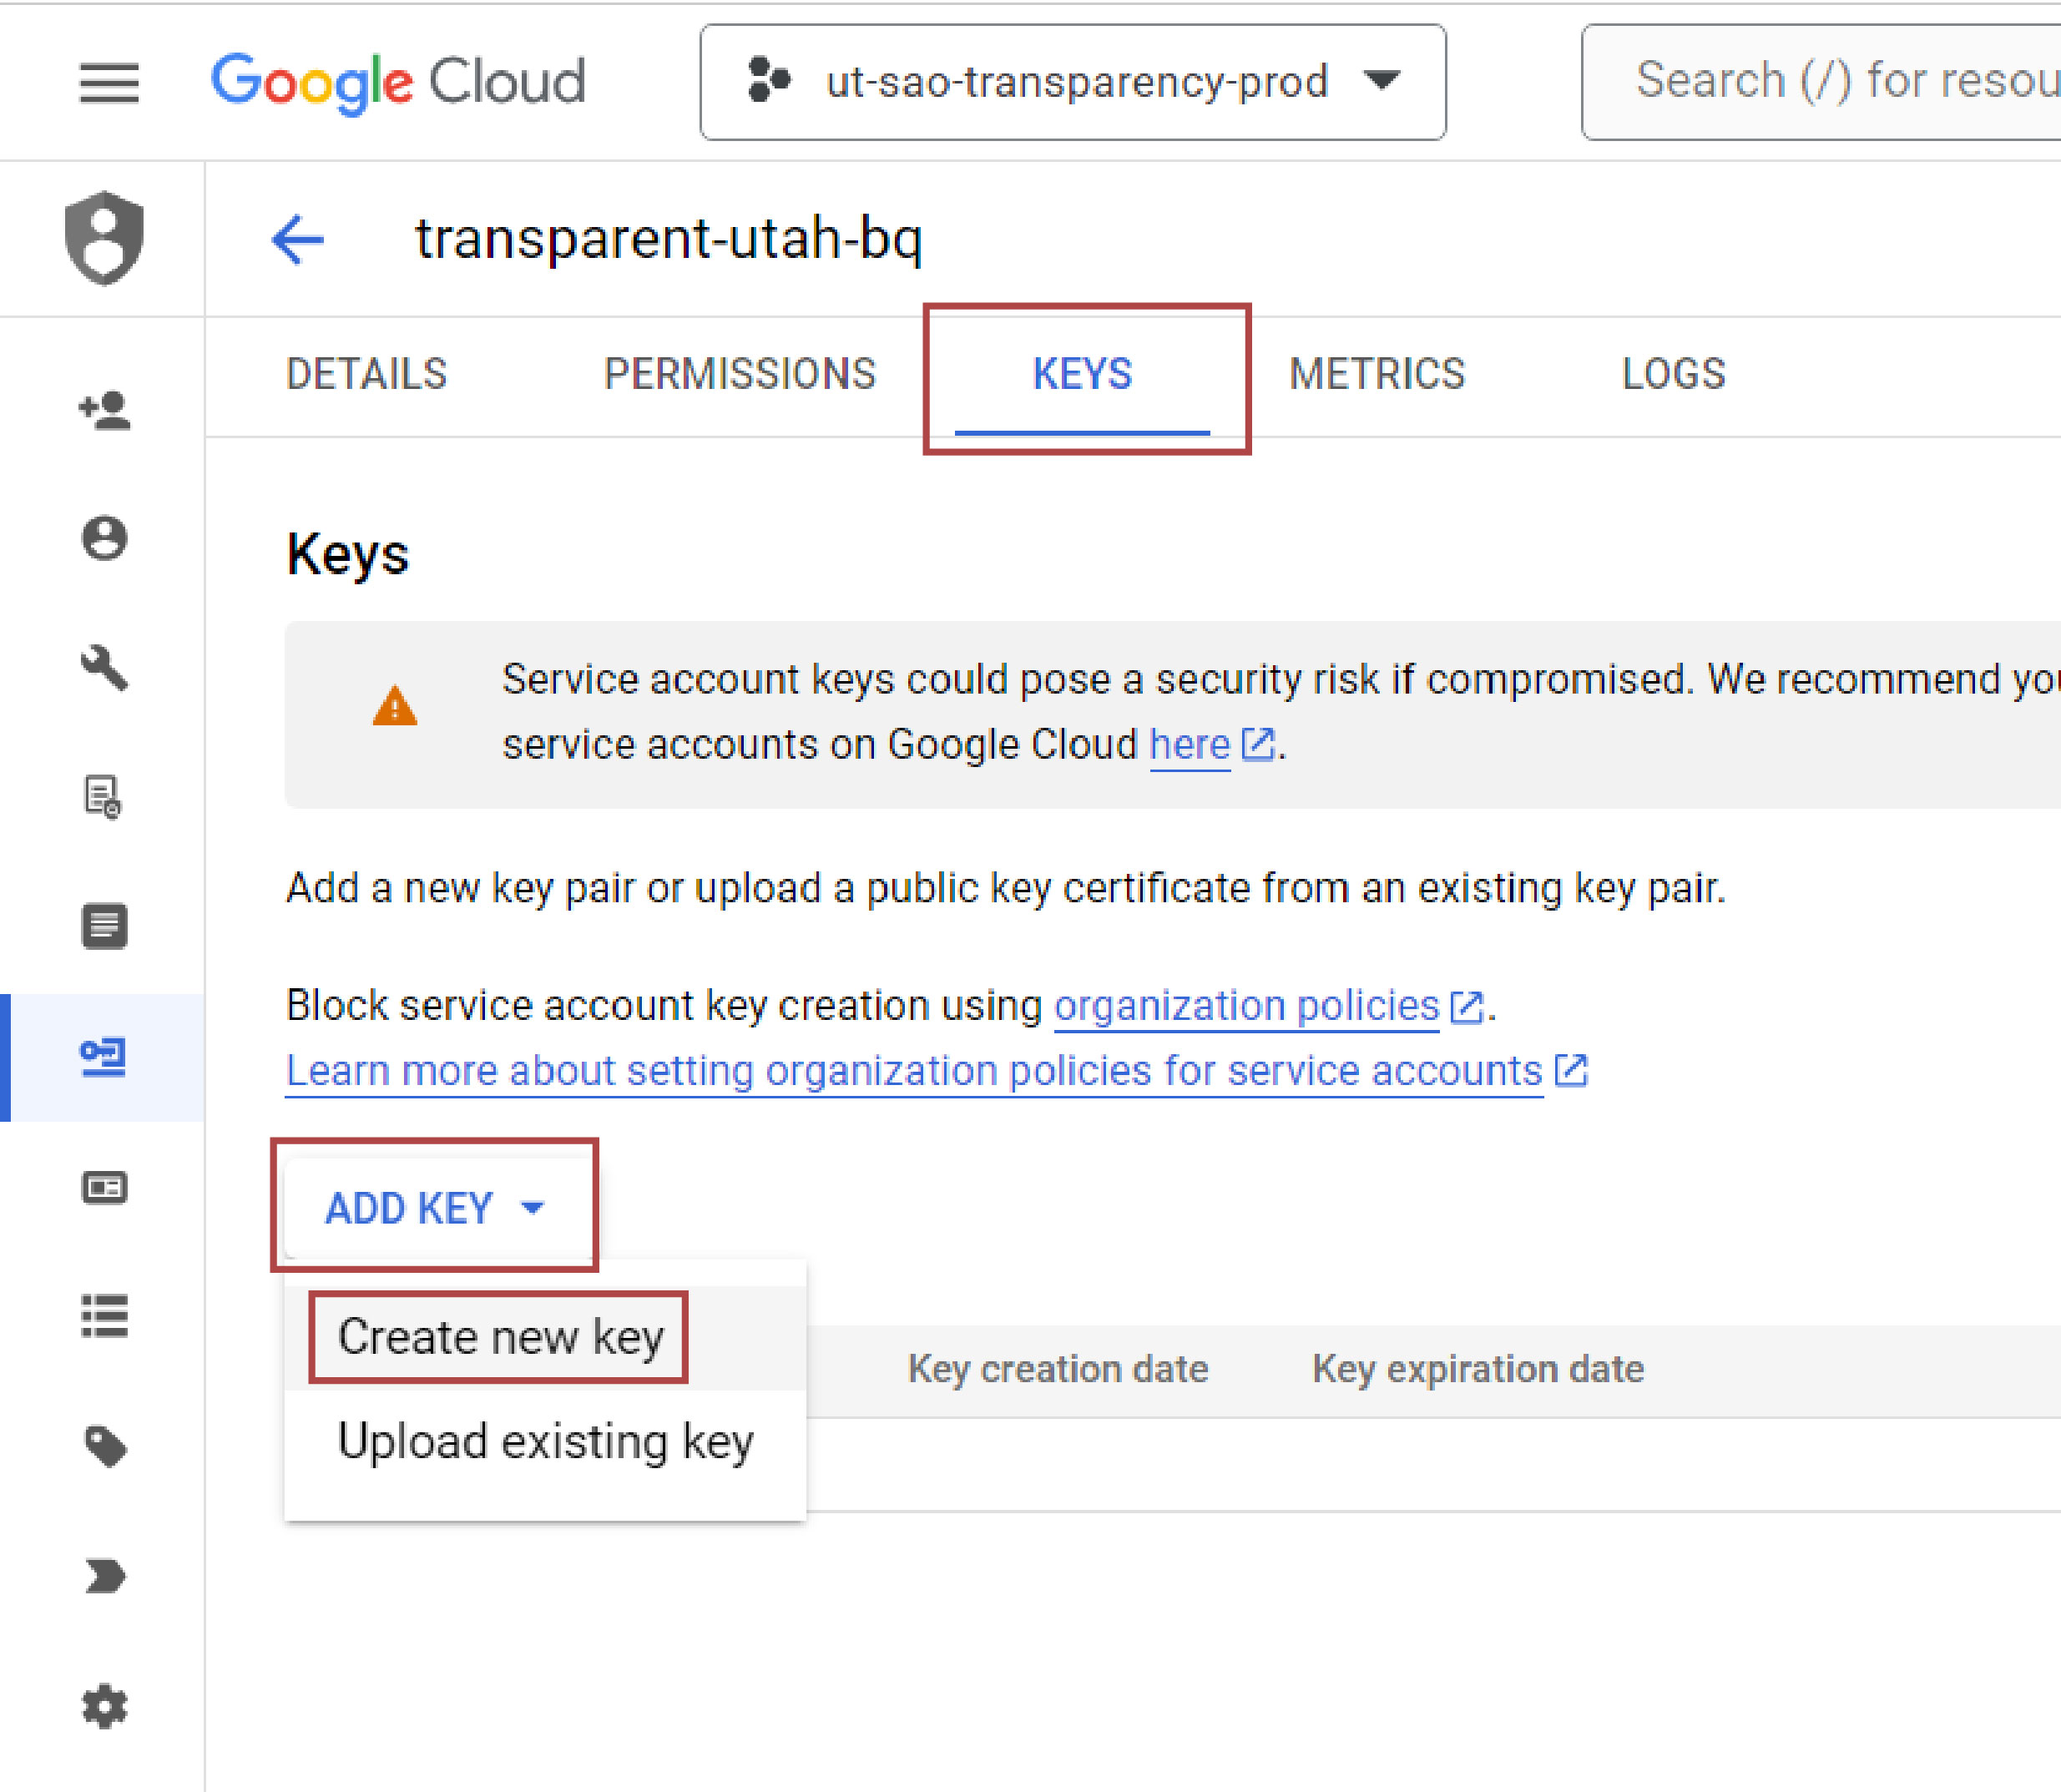
instructions screenshot 12

Make sure 'JSON' is the key type and the click "Create". A service account json key will go to your downloads folder. Make sure to move it somewhere safe and secure on your computer.
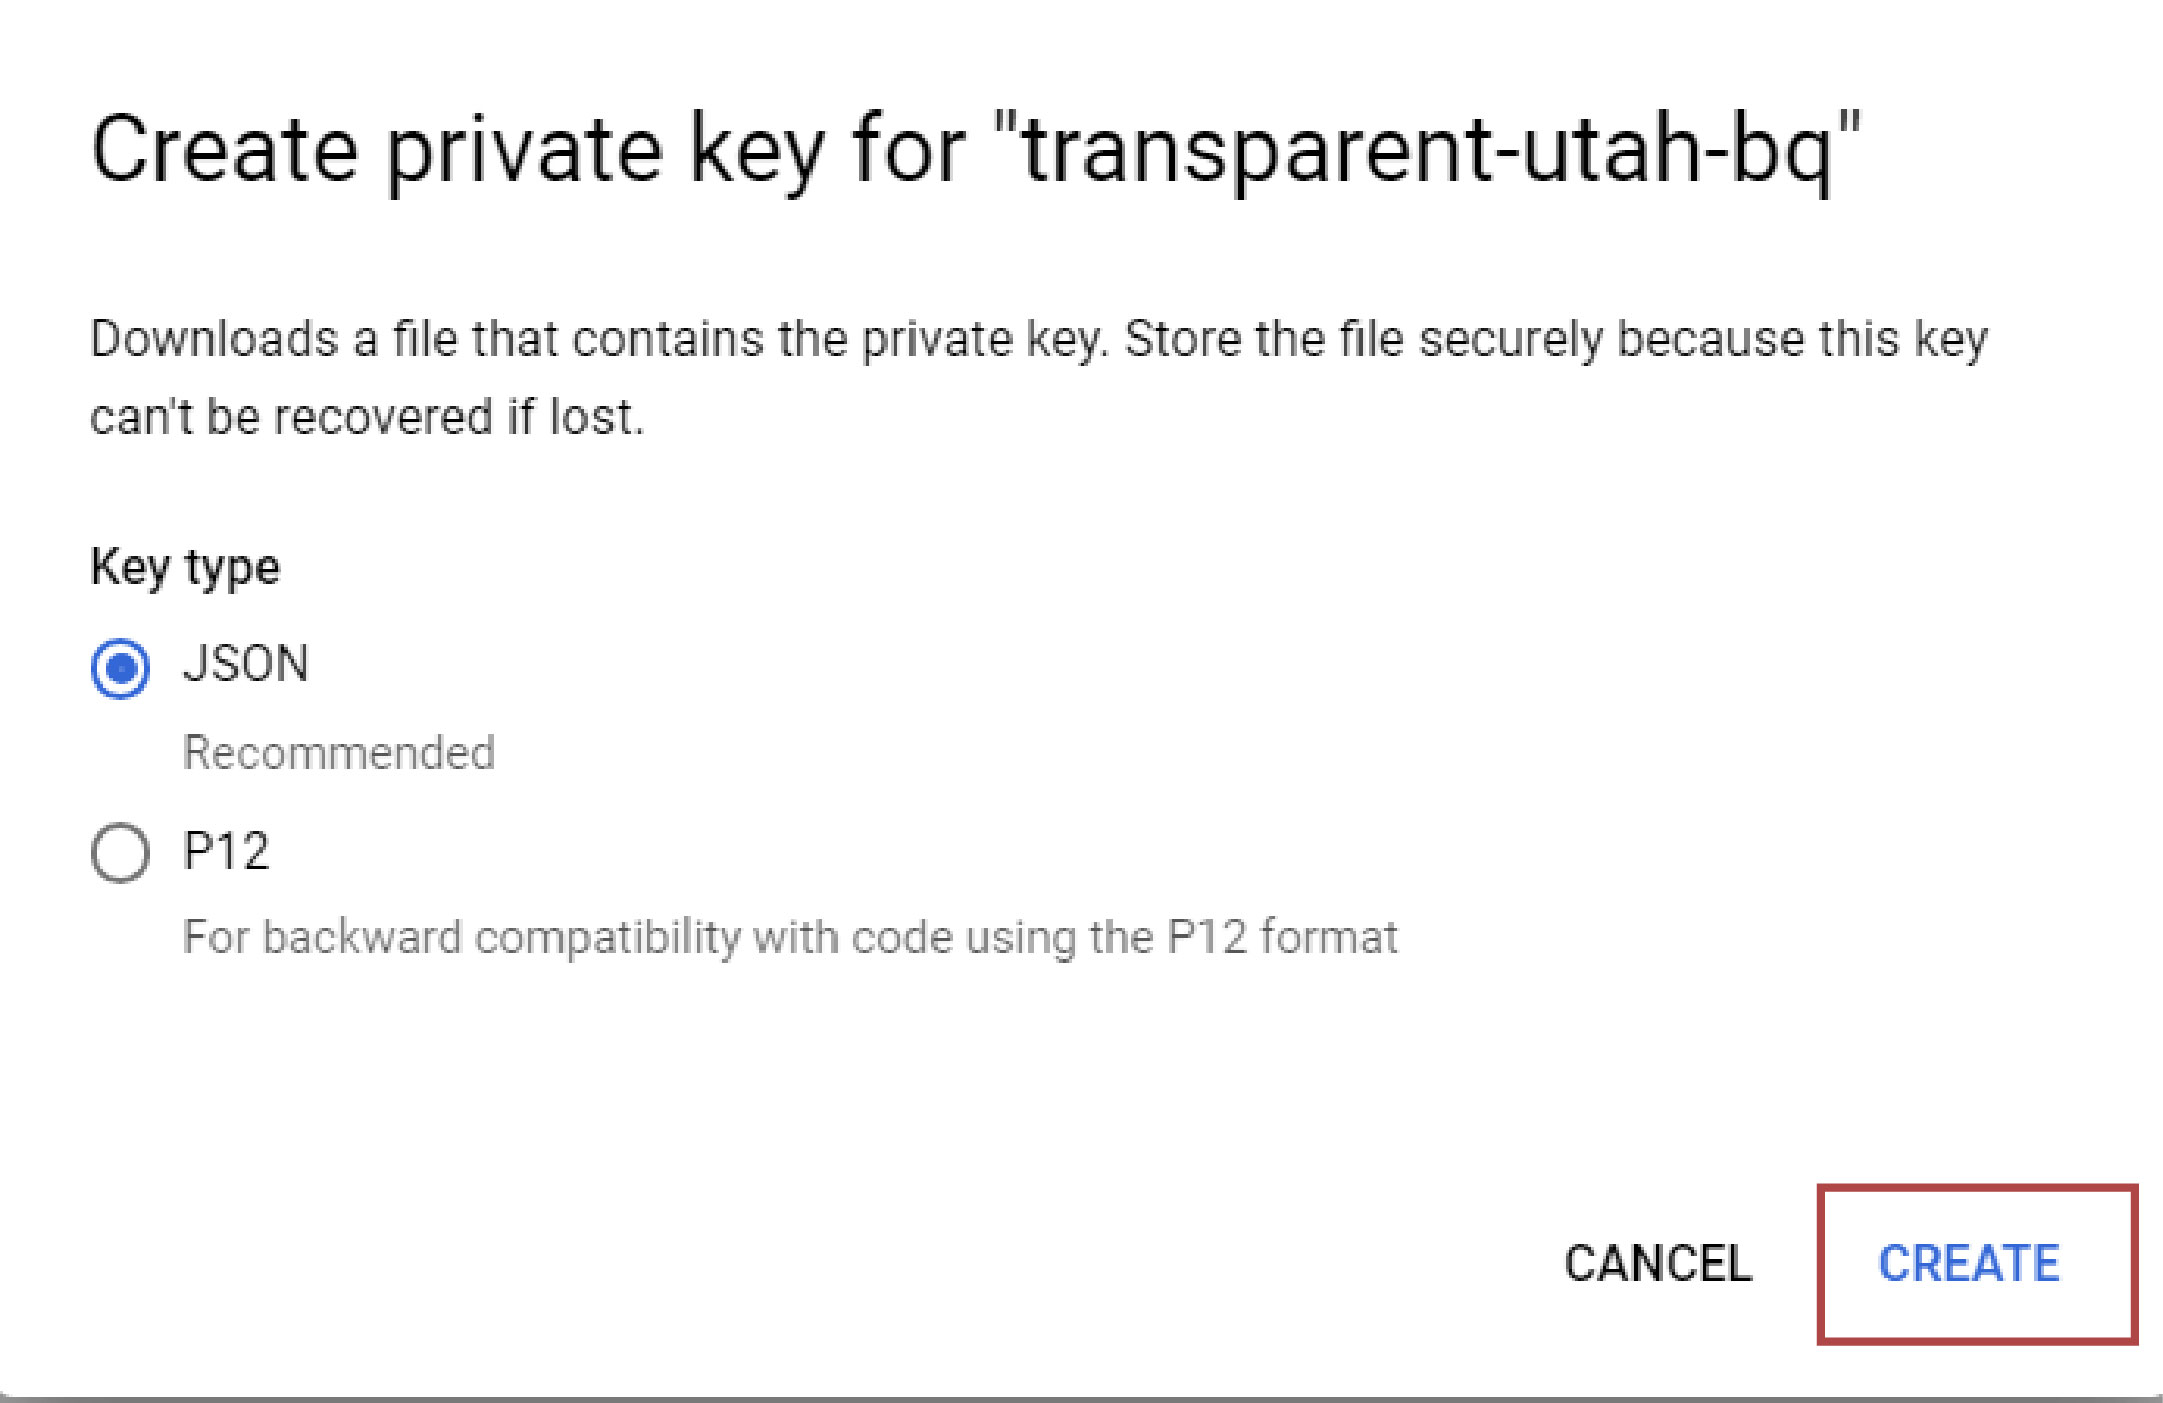
instructions screenshot 13